
Pruning
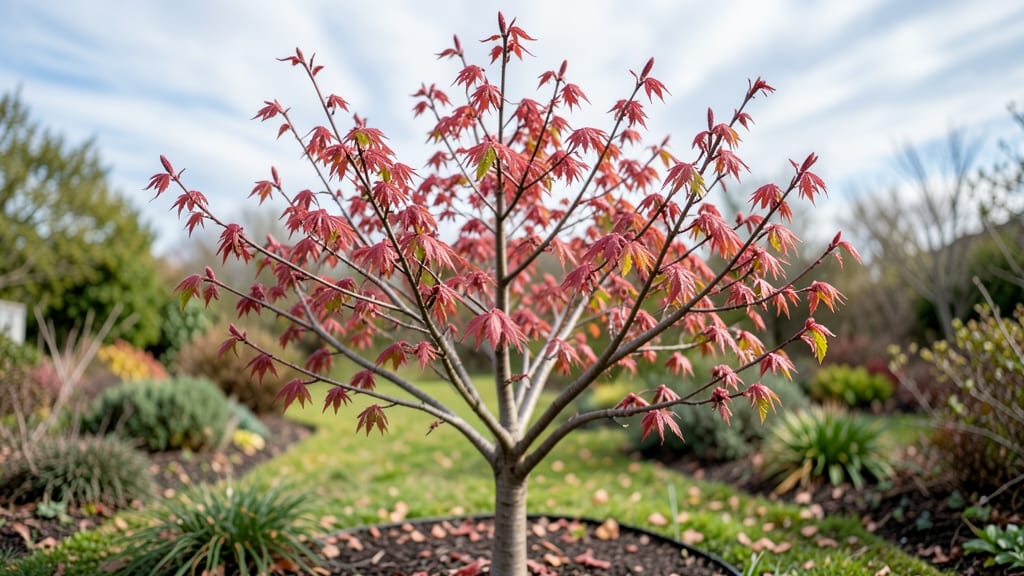
Pruning your red maple tree in early spring isn't just about shaping—it's about setting up a season of vibrant growth and disease resistance. 🌿 I've learned that timing matters more than you'd think: too early and you risk damaging new buds; too late and you miss the window for strong recovery.
The key is to act when the tree shows fresh leaf buds but before they burst open—usually in late February or March, depending on your zone.
You'll need sharp pruning shears, a ladder (for taller branches), and a bucket to collect debris. The goal is to remove dead, crossing, or weak branches first—these are the 50% of cuts that make the biggest difference.
Then, thin out the canopy by about 20% to let sunlight reach the inner branches. Think of it like giving your tree a haircut that promotes airflow and reduces stress.
After pruning, you'll notice new growth shoots appearing within 2-3 weeks, with fuller foliage by summer. The tree will also be better equipped to fight off common early spring pests like aphids or scale.
Just be sure to sterilize your tools between cuts to prevent spreading disease—this is where most gardeners slip up.
Works for both young saplings and mature trees, though larger specimens may need professional help for branches over 3 inches thick. The payoff? A red maple that bursts with color in fall and stands strong through winter. Ready to sharpen those shears?
📚 In This Guide
- What you need
- Instructions
- Tips and common mistakes
- Wrapping up and next steps
What you need
- ● Bypass pruning shears – Sharp, clean, and rated for 2-inch cuts (1 pair).
- ● Loppers – For branches ½-inch to 2-inches thick (1 pair).
- ● Pruning saw – For thicker branches (2+ inches) (1 small handsaw).
- ● Disinfectant (70% isopropyl alcohol or pruning sealant) – 1 small bottle.
- ● Heavy-duty gloves – Cut-resistant, long sleeves (1 pair).
- ● Ladder or sturdy step stool – Reach branches safely (extendable preferred).
- ● Trash bags or bucket – For debris (2-3 large bags).
- ○ Sharpie or labeling tape – Optional, for marking cuts.
- ● Pruning paint – For sealing large cuts (1 small bottle).
- ● Extension pole pruners – For high branches (1 pair).
- ● Safety glasses – Protects from debris (1 pair).
- ● Tree wound dressing – Controversial but useful for some cuts.
Step-by-step guide to pruning a red maple in early spring
Here's how I approach early spring pruning to encourage vigorous growth and maintain your tree's natural shape.
✂️ Step 1: Identify and Remove Dead or Diseased Branches
Start by examining the tree for branches that are completely dead, showing no signs of life even when scratched. These will be brittle and snap easily when bent. Use sharp pruning shears to make clean cuts just outside the branch collar—the swollen area where the branch meets the trunk. This ensures proper healing and prevents disease from entering the wound.
Next, look for branches with signs of disease like discolored bark, oozing sap, or fungal growth. These should be removed immediately to prevent the spread. I always disinfect my tools with rubbing alcohol between cuts to keep pathogens from jumping between branches.
✂️ Step 2: Prune for Structure and Airflow
Focus on removing branches that cross or rub against each other—they'll eventually create wounds and invite disease. Look for branches growing straight upward; these often become weak and should be removed to encourage a more balanced canopy. Limit yourself to removing no more than 25% of the tree's total foliage in one season to avoid stressing the tree.
Thin out the interior branches to improve airflow and sunlight penetration. Red maples need good airflow to prevent fungal issues like anthracnose. You'll see the difference in just a few years—better leaf color and fewer pest problems.
✂️ Step 3: Shape the Canopy for Balance and Beauty
Step back and assess the tree's overall shape. Red maples have a naturally graceful form, so avoid heavy pruning that disrupts their elegant silhouette. Focus on removing small, weak branches rather than making large cuts. For branches thicker than 1.5 inches, use a three-cut method to prevent tearing the bark.
Make your first cut about 6-12 inches out from the trunk on the underside of the branch. Then cut about 3 inches further out on the top side. Finally, make your final cut just outside the branch collar. This prevents the bark from tearing as you remove larger branches.
✂️ Step 4: Clean Up and Monitor for New Growth
After pruning, collect and dispose of all debris—especially diseased branches—to prevent reinfection. Seal larger wounds (over 2 inches in diameter) with a tree wound sealant to protect against pests and disease. Smaller cuts will heal naturally on their own.
Watch for new growth in 4-6 weeks. Healthy red maples should show fresh green shoots along the branches you've pruned. If you see no new growth after 8 weeks, it might indicate stress from over-pruning or other issues like drought or poor soil.
🌱 Step 5: Post-Pruning Care for Strong Recovery
Water deeply around the tree's drip line to help it recover from the stress of pruning. A slow, deep watering once a week is better than frequent shallow waterings. Mulch with 2-3 inches of organic mulch, keeping it 6 inches away from the trunk to prevent rot.
Keep an eye out for signs of stress like wilting leaves or unusual leaf drop. If you notice these symptoms, hold off on any additional pruning until the tree has had time to recover. Red maples are resilient, but they do best when given time to adjust after pruning.
Tips & tricks for perfect red maple tree pruning
Here's what nobody tells you about getting the most out of your red maple's early spring pruning.
Tool Prep is Everything: I can't stress enough how important it is to use sharp, clean tools. Dull pruning shears crush branches instead of making clean cuts, which slows healing. Test your tools by cutting through a piece of paper—if it tears instead of cleanly slicing, they need sharpening. I also keep a small bottle of rubbing alcohol in my tool bag for quick disinfection between cuts, especially when dealing with diseased branches.
The 25% Rule Makes All the Difference: When pruning red maples, never remove more than 25% of the total foliage in one season. This keeps the tree from becoming stressed, which can lead to weak growth or even death. Think of it like haircuts—you wouldn't shave your head completely in one go, right? The same principle applies to trees. If you're unsure about how much you're removing, take photos before and after to compare.
Branch Collar Awareness: The branch collar—the swollen area where a branch meets the trunk—is crucial for proper healing. Always make your final cut just outside this collar, never inside it. Cutting too close can damage the tree's natural defense system. I like to visualize this as making a "U" shape with my cut, following the natural contours of the branch. This technique ensures the wound can seal properly and reduces the risk of disease entering the tree.
Seasonal Timing Insight: Early spring is the perfect time because the tree is just starting to wake up from dormancy, but before new growth begins. This timing allows you to see the tree's structure clearly without the distraction of leaves. If you miss this window, you can still prune in late fall, but avoid pruning in late spring or summer when the tree is actively growing and more vulnerable to stress.
Pro Tips for Red Maple Tree In Early Spring
- Here's what nobody tells you about getting the most out of your red maple's early spring pruning.
- Tool Prep is Everything: I can't stress enough how important it is to use sharp, clean tools.
- The 25% Rule Makes All the Difference: When pruning red maples, never remove more than 25% of the total foliage in one season.
Frequently asked questions
about red maple tree pruning in early spring—got you covered! Whether you're a first-timer or just need a quick refresher, these answers will help you tackle your tree with confidence.When is the exact best time to prune a red maple in early spring?
The ideal window is late winter to early spring—specifically, just as the buds begin to swell but before they burst (usually February to March, depending on your climate zone). This timing minimizes sap loss and encourages vigorous growth. Avoid pruning during freezing temps or heavy sap flow (like late winter in colder regions).
Can I prune a red maple if it’s already bleeding sap in early spring?
If your tree is actively bleeding sap (clear or reddish drips), it’s best to wait until the flow slows (often by late March or April). Pruning during heavy sap flow stresses the tree and can lead to dieback. If you must prune, do so on a dry, cool day and seal larger cuts with pruning sealant to reduce sap loss.
What if my red maple has dead or diseased branches—should I still wait for early spring?
Dead, diseased, or dangerously weak branches (e.g., rubbing against structures or hanging precariously) should be removed immediately, regardless of season. However, for healthy structural pruning, stick to early spring. Remove deadwood first, then wait for the right timing to shape the tree.
How do I know if I’m over-pruning my red maple?
Over-pruning happens when you remove more than 20-25% of the tree’s canopy in one season. Signs include excessive sap bleeding, stunted new growth, or yellowing leaves. Red maples are resilient, but never remove more than 1/3 of the foliage at once. Focus on selective cuts to maintain the tree’s energy balance.
What’s a good alternative if I miss early spring pruning?
If you miss early spring, your next best option is summer pruning (June to early August). Avoid pruning in late summer or fall, as this can stimulate tender new growth that’s vulnerable to winter damage. Summer pruning is less ideal but still effective for removing water sprouts or shaping the tree.
Wrapping up and next steps
Watching a red maple tree burst into life in early spring is one of nature’s most rewarding sights—and with the right pruning techniques, you can ensure its health and beauty for years to come! 🌿 By following the steps outlined here, you’ll promote stronger growth, reduce disease risks, and even enhance your tree’s stunning foliage.
Now that you’re armed with the knowledge, grab those pruners and give your red maple the care it deserves.
Ready to take it further? Mark your calendar for late winter or early spring next year—consistency is key! For extra guidance, explore local arborist resources or join gardening communities to swap tips with fellow green thumbs. Happy pruning! ✂️🌳