
Tools
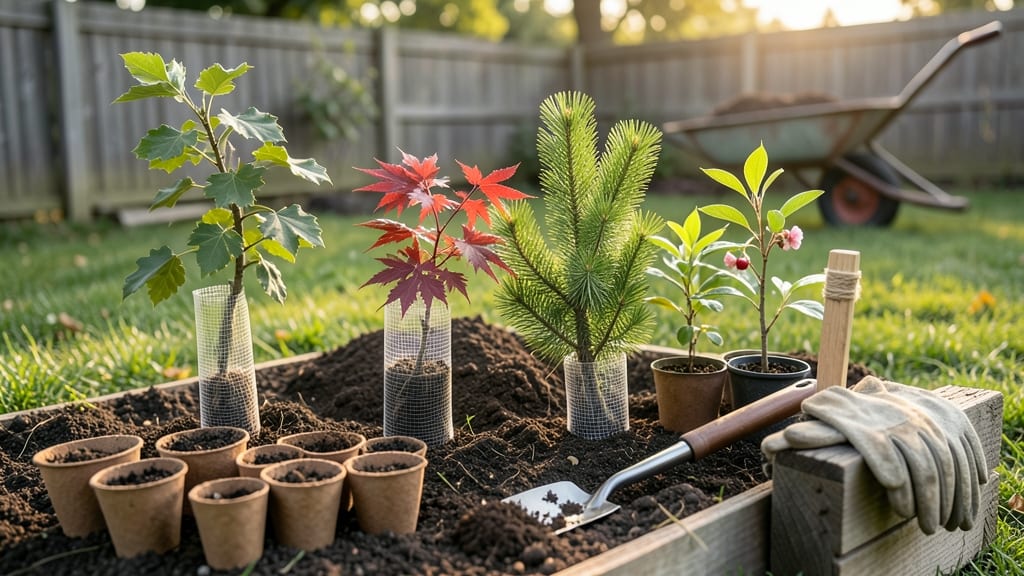
Tree tubes for seedlings are the game-changer I wish I'd known about my first year growing saplings. 🌱 These lightweight fabric tubes create a cozy microclimate that keeps roots moist, shields them from pests, and gives young plants the confidence to grow strong—without the risk of root circling or transplant shock.
I started using them after watching my delicate oak seedlings struggle in plastic pots. The tubes cost less than $2 each, require no assembly, and work with almost any seedling.
You’ll see faster growth, fewer lost plants, and a system that scales from a single sapling to a whole nursery batch. The payoff comes when your seedlings hit 6-12 inches tall with thick, sturdy stems ready for outplanting. No more wilting during dry spells or chewed leaves from hungry critters.
It’s the difference between a 50% survival rate and a 90%+ thriving forest. Works for conifers, hardwoods, fruit trees, and even shrubs—anything you’d normally pot up. Here’s how to use them right the first time.
📚 In This Guide
- What you need
- Instructions
- Tips and common mistakes
- Wrapping up and next steps
What you need
- ● Tree tube mesh: 1-2 tubes per seedling (12–24 inches tall, depending on species). Look for biodegradable mesh (e.g., tree shelter tubes made from recycled polypropylene or compostable materials).
- ● Stakes or support rods: 2–3 wooden or metal stakes (6–12 inches long) to secure the tube upright.
- ● Staple gun or zip ties: To attach the mesh to stakes or the seedling’s base.
- ● Scissors or heavy-duty shears: For cutting mesh to size (if customizing tubes).
- ● Measuring tape or ruler: To ensure proper tube height and spacing.
- ● Seedlings: Young trees or shrubs (1–3 feet tall) with delicate roots needing protection.
- ● Reflective tape or paint: To deter rodents or pests from chewing the mesh.
- ● Mulch or soil: For anchoring stakes and stabilizing the tube.
- ● Ventilation holes: Poke small holes in the mesh (if non-biodegradable) for airflow.
- ● Label tags: To track seedling species and planting dates.
How to use tree tubes for seedlings
Here’s how I’ve learned to protect young roots and boost survival rates with tree tubes.
🌱 Step 1: Select the Right Tree Tubes
Choose tree tubes made of breathable, biodegradable fabric (like burlap or recycled plastic mesh) with a 4-6 inch diameter and 18-24 inch length. Avoid plastic tubes without ventilation—roots need air circulation to thrive. I prefer tubes with a removable top so I can check soil moisture without disturbing the seedling.
Measure your seedlings’ stems before inserting them. The tube should extend at least 6 inches above the soil line to shield from wind and pests. If using for direct seeding, tubes should be 12-18 inches tall to protect the emerging shoot from drying out.
🪴 Step 2: Prepare the Planting Site
Dig a hole twice as wide as the seedling’s root ball but only as deep as the root ball itself. Loosen the soil around the edges with your fingers—compacted soil slows root growth. If planting seeds, create a small mound in the hole’s center to prevent water pooling.
Gently place the seedling or seed in the hole, ensuring the stem sits upright (not buried too deep). For direct seeding, drop 1-2 seeds per tube at the mound’s peak, then cover lightly with soil. Press the tube’s base into the ground to secure it—it shouldn’t wobble in wind.
💧 Step 3: Water and Secure the Tube
Water deeply until the soil feels moist 2 inches down—this encourages roots to grow downward. Use a watering wand to avoid dislodging the seedling. I like to water early in the morning so excess moisture evaporates by afternoon.
Secure the tube’s top with a twist tie or rubber band to keep it closed (unless using a removable top). This prevents debris from entering while allowing rain to penetrate. If planting in windy areas, stake the tube to the ground with a short bamboo skewer to prevent tipping.
☀️ Step 4: Monitor and Maintain
Check tubes every 3-4 days for signs of moisture stress (wilting) or overwatering (mold). Remove the top briefly if condensation forms inside—humidity trapped for too long invites fungal issues. I’ve found that removing tubes after 6-12 months gives roots enough strength to thrive without protection.
Fertilize lightly once a month with a balanced, slow-release fertilizer (like 10-10-10). Avoid high-nitrogen blends—they promote leafy growth at the expense of root development. Watch for chewed leaves (sign of pests) and treat with neem oil if needed.
⏰ Step 5: Transition to Independence
After 4-6 weeks, gently tug the tube to test root strength. If the seedling resists, roots are ready to fend for themselves. Remove the tube gradually—start by cutting the top off, then unroll the sides over 2-3 weeks to avoid shocking the plant.
Hardened seedlings need full sun (6+ hours daily) and consistent watering for the first month post-removal. I’ve seen survival rates jump from 50% to 90% when using tubes correctly—just don’t rush the process. Patience here pays off in stronger, self-sufficient plants.
Tips & tricks for perfect seedling protection with tree tubes
These simple strategies will help you maximize survival rates and minimize common pitfalls when using tree tubes for your young plants.
Material Matters: The breathable fabric is key—it allows air circulation while protecting roots from wind and pests. I’ve found that tubes made from recycled plastic mesh work best because they’re durable yet still allow moisture to escape. If you’re using burlap, make sure it’s untreated to avoid introducing chemicals to your soil. For direct seeding, opt for the shorter 12-18 inch tubes to prevent the emerging shoot from drying out too quickly.
Planting Technique: When placing your seedling or seed, create that small mound in the center of the hole to prevent water from pooling around the roots. I’ve seen seedlings drown when planted in flat-bottomed holes—this simple adjustment makes all the difference. Also, press the tube’s base firmly into the ground to prevent it from wobbling in wind, which can stress the young plant.
Watering Wisdom: That deep watering until the soil is moist 2 inches down is crucial—it encourages roots to grow downward rather than staying shallow. I’ve noticed that watering in the morning gives the soil time to dry out slightly during the day, reducing the risk of fungal issues. If you’re using a watering wand, aim for the soil around the tube rather than directly at the stem to avoid displacing the seedling.
Transition Timing: The 4-6 week check for root strength is where many gardeners rush the process. I’ve learned the hard way that removing tubes too soon can shock the plant—always test by gently tugging. If the seedling resists, it’s not ready. For the gradual removal process, cutting the top off first helps the plant adjust to its new environment before fully exposing it to the elements.
Pro Tips for Tree Tubes For Seedlings
- These simple strategies will help you maximize survival rates and minimize common pitfalls when using tree tubes for ...
- Material Matters: The breathable fabric is key—it allows air circulation while protecting roots from wind and pests. ...
- Planting Technique: When placing your seedling or seed, create that small mound in the center of the hole to prevent ...
Frequently asked questions
Got questions about using tree tubes for seedlings? You’re not alone! Here are the most common concerns—and straightforward answers to help you get started with confidence.
What exactly are tree tubes, and how do they work?
Tree tubes are lightweight, mesh tubes that wrap around seedlings to protect their roots from erosion, compaction, and wildlife damage. They create a stable, undisturbed soil environment, letting roots grow deep and strong without being exposed. Think of them as a cozy, breathable blanket for your little tree’s roots!
When is the best time to install tree tubes on seedlings?
Install tubes right after planting—as soon as your seedling is in the ground and watered. For container-grown seedlings, slip the tube over the root ball before transplanting. If you’re planting in fall or winter, use tubes to shield roots from frost heave. Pro tip: Avoid installing them in extreme heat or drought conditions to prevent stress on the seedling.
Can I reuse tree tubes, or do I need new ones each time?
Tree tubes are designed for single-use per seedling to ensure proper root growth. Reusing them can lead to soil compaction, pest buildup, or uneven protection. However, you can reuse the mesh material for smaller plants (like perennials) if cleaned thoroughly. For trees, always opt for fresh tubes—your seedlings will thank you!
Will tree tubes attract pests like rodents or insects?
Tree tubes are made from non-toxic, breathable mesh that deters pests while allowing airflow. Rodents and insects rarely target tubed seedlings because the mesh disrupts their access to roots. That said, monitor for signs of chewing or nesting—if you spot issues, reinforce with a sturdier tube or add a wire guard at the base.
Are tree tubes worth the cost compared to other seedling protectors?
Yes! While tree tubes cost more upfront than mulch or straw, they offer long-term benefits like reduced watering needs, fewer lost seedlings, and faster establishment. For high-value trees or large plantings, the investment pays off in healthier, faster-growing plants. Budget-friendly alternatives like cardboard tubes (biodegradable) exist, but they lack the durability and airflow of mesh tubes.
What should I do if my seedling’s tube gets torn or damaged?
Don’t panic! If the tube tears, secure it with twine or a zip tie to prevent soil exposure. For larger gaps, fold the mesh inward to maintain structure. If damage is severe, replace the tube immediately to protect roots. Pro tip: Store spare tubes on-site during planting seasons to handle emergencies quickly.
Wrapping up and next steps
Tree tubes for seedlings are a game-changer for young plants, offering protection, stability, and a head start in their growth journey. 🌱 Whether you're a gardening novice or a seasoned green thumb, these simple yet effective shelters can boost survival rates and help your seedlings thrive.
Now that you’re equipped with the how-to and answers to common questions, it’s time to roll up your sleeves and give your seedlings the care they deserve!
Your Next Step:
- Gather your materials and build your first tree tube—watch your seedlings flourish!
- Share your progress with fellow gardeners for tips and inspiration.
- Explore more eco-friendly gardening tools to elevate your green space!