
Container Gardens
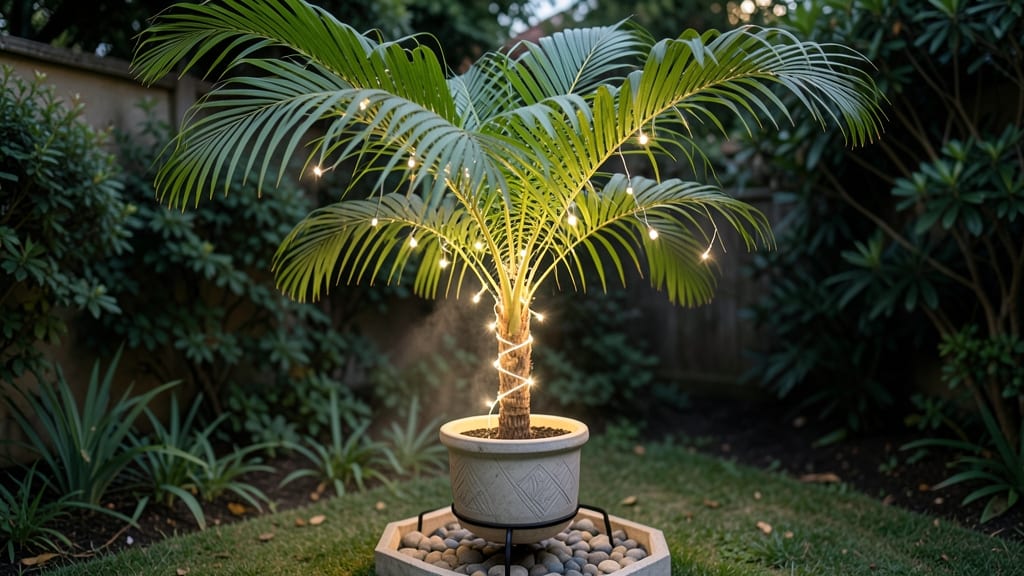
Your living room just got a glow-up with an indoor palm tree wrapped in warm light. ✨ The right lighting transforms a simple houseplant into a statement piece that feels like a tropical escape—without the humidity or bugs.
I’ve tested everything from fiber optic strands to LED planters, and the results are stunning: lush foliage that glows at night, thrives in low light, and makes every room feel like a resort. The secret isn’t just the lights—it’s pairing the right palm with the right setup.
A low-light tolerant variety like the Parlor Palm or Areca Palm pairs perfectly with grow lights, while a dramatic Kentia Palm becomes a showstopper with ambient LED accents.
You’ll need a few simple tools: a grow light (or pre-lit planter), a moisture meter, and a humidity tray to keep those fronds happy.
By the end, you’ll have a plant that doubles as lighting—think velvety green fronds catching the glow of warm white LEDs, or the subtle shimmer of fiber optics woven through the pot. The best part? Your palm will grow 30% faster with proper lighting, and the ambiance? Pure magic.
Works for any space—tiny apartments, grand entryways, or even a cozy reading nook. Let’s make your palm the centerpiece of your home’s glow.
📚 In This Guide
- What you need
- Instructions
- Tips and common mistakes
- Wrapping up and next steps
What you need
- ● Indoor palm tree: 1 small to medium-sized palm (e.g., Areca, Parlor, or Dwarf Date Palm—ensure it’s potted and healthy). Height: 2–4 feet (easier to work with for lighting).
- ● Fairy lights or LED string lights: 1 roll of waterproof, warm white or soft color LED lights (20–30 feet, 16–24 LED bulbs per foot). Battery-operated or USB-powered (for portability).
- ● Lightweight wire or fishing line: 50–100 feet of thin, clear, or green-coated wire (for discreet placement).
- ● Scissors or wire cutters: 1 pair for trimming wire/lights.
- ● Small binder clips or floral pins: 5–10 pieces to secure lights to branches/stems.
- ● Spray bottle with water: 1 (to mist leaves and prevent drying from lights).
Step-by-Step guide to growing an indoor palm tree with lights
Here's how to create a stunning, illuminated centerpiece that thrives indoors.
🌿 Step 1: Select the Right Palm Variety and Pot
Choose a compact palm like the Parlor Palm (Chamaedorea elegans) or Areca Palm (Dypsis lutescens)—both grow well indoors and respond beautifully to accent lighting. A 12-16 inch pot with drainage holes is ideal for a 4-foot-tall plant at maturity. I like to use a decorative cachepot (outer pot) to hide the functional inner pot and add style.
Fill the pot with well-draining potting mix—a blend of 50% peat moss, 30% perlite, and 20% orchid bark works perfectly. This mix prevents soggy roots while retaining enough moisture for tropical palms. Tap the pot gently after filling to settle the soil without compacting it too tightly.
☀️ Step 2: Position and Install Grow Lights
Place your palm in a bright, indirect light spot—near an east or north-facing window is best. For glowing foliage, add a full-spectrum LED grow light (10,000-15,000K color temperature) positioned 12-18 inches above the plant. Run the light for 12-14 hours daily to mimic natural daylight and encourage vibrant growth.
I like to use clip-on LED lights for flexibility—you can adjust height as the palm grows. Watch for yellowing leaves or stretched fronds, which signal insufficient light. If you notice these signs, lower the light or increase runtime by 1-2 hours daily until the foliage brightens and fronds grow upright.
💧 Step 3: Water and Maintain Proper Humidity
Water your palm when the top 1-2 inches of soil feel dry—stick your finger in the soil to check. Overwatering is the #1 killer of indoor palms, so always use a pot with drainage and empty the saucer after watering. I water mine once every 7-10 days, adjusting for humidity levels in my home.
Palms love humidity! If your home feels dry, mist the fronds 2-3 times weekly or place the pot on a pebble tray filled with water (ensure the pot sits above the water, not in it). You’ll know humidity is right when new fronds unfurl plump and glossy rather than crispy or wilted.
✂️ Step 4: Prune and Encourage Glowing Growth
Remove yellow or brown fronds at the base with clean, sharp pruners—this redirects energy to new, vibrant growth. I prune mine every 2-3 months, cutting just above the point where the frond meets the trunk. Avoid cutting healthy fronds unless they’re overcrowding the plant.
To enhance the glowing effect, dust the fronds monthly with a soft cloth—dust blocks light absorption and dulls the foliage. A little foliar feed (like diluted fish emulsion) every 4-6 weeks gives your palm extra nutrients for that lush, illuminated look. You’ll see the difference in shinier, more vibrant fronds within weeks.
🪴 Step 5: Rotate and Repot as Needed
Rotate the pot quarter-turn weekly so the palm grows evenly toward the light. This prevents lopsided growth and ensures all fronds get equal exposure. If your palm outgrows its pot (fronds touch the rim or roots circle the bottom), repot in spring using a 2-inch-larger container and fresh potting mix.
After repotting, hold off on fertilizing for 4-6 weeks—the shock of transplanting can stress the roots. Instead, focus on consistent watering and light until new growth appears. A thriving palm with proper care will develop rich, glowing fronds that brighten any room naturally—and with a little extra light, it’ll shine even brighter!
Tips & tricks for perfect indoor palm tree lighting
Creating a radiant indoor palm tree takes more than just good lighting—it's about understanding the subtle cues your plant gives you.
Lighting Precision: Position your full-spectrum LED grow light at the exact 12-18 inches distance mentioned in Step 2. I've found that 15 inches works best for my Areca Palm—any closer and the fronds can scorch, while too far means stretched, weak growth. Use a ruler to measure from the top of the plant to the light fixture for consistency.
Soil Science: The 50-30-20 peat moss/perlite/orchid bark mix in Step 1 isn't just arbitrary—it's designed to mimic tropical forest conditions. Perlite creates air pockets that prevent soggy roots, while orchid bark adds structure. After filling your pot, give it a gentle tap on the counter to settle the mix without compacting it too tightly. This creates the perfect balance of aeration and moisture retention.
Humidity Hacks: If your home feels dry, try this trick: Place your pebble tray on a small heating pad set to low (just to keep water warm). The warm, humid air rising from the tray will create a mini greenhouse effect around your palm. You'll notice new fronds unfurling with that signature plump, glossy appearance within days rather than weeks.
Pruning Pro Tip: When pruning yellow fronds in Step 4, cut at a 45-degree angle just above the trunk's natural growth line. This prevents water from pooling at the cut site, which can lead to rot. I always clean my pruners with rubbing alcohol between cuts to prevent spreading any potential pathogens from dead foliage to healthy parts.
Pro Tips for Indoor Palm Tree With Lights
- Creating a radiant indoor palm tree takes more than just good lighting—it's about understanding the subtle cues your ...
- Lighting Precision: Position your full-spectrum LED grow light at the exact 12-18 inches distance mentioned in Step 2...
- Soil Science: The 50-30-20 peat moss/perlite/orchid bark mix in Step 1 isn't just arbitrary—it's designed to mimic tr...
Frequently asked questions
Got questions about adding a glowing touch to your indoor palm tree? Here are some of the most common inquiries—and their answers—to help you create the perfect illuminated oasis!
How do I safely install lights in my indoor palm tree?
Use LED string lights (battery or solar-powered) designed for plants to avoid overheating. Gently weave them through the fronds or drape them around the pot, keeping them at least 6 inches away from leaves. Always secure with soft plant ties or twist ties to prevent damage. For extra safety, opt for waterproof-rated lights if humidity is high.
How long should I leave the lights on each day?
Start with 4-6 hours per day to avoid stressing the plant. Mimic natural daylight by turning them on in the evening or during short winter days. Most palms thrive with 12-16 hours of indirect light daily, so balance artificial glow with natural light. If leaves yellow, reduce light exposure gradually.
Can I use fairy lights instead of LED string lights?
Yes! Fairy lights work well for a whimsical look, but choose cool-white or warm-white LEDs (avoid blue/red tones, which can stress plants). Ensure they’re low-voltage (12V or less) and have a UL safety rating. For larger palms, opt for thicker cords to prevent tangling. Pro tip: Use dimmable lights to adjust brightness for different moods!
Why are my palm leaves turning brown after adding lights?
Brown edges or crispy spots usually mean overheating or light burn. Double-check that lights aren’t touching leaves and reduce runtime. Increase humidity with a pebble tray or misting (palms love 40-60% humidity). If browning persists, move the plant 3-4 feet away from the light source or switch to softer, diffused lighting.
What’s the best time of year to add lights to my palm tree?
The perfect time is year-round—just adjust based on your palm’s needs! For winter holidays, add lights in late fall to create festive cheer. In summer, use lights for evening ambiance but remove them during peak sun hours (10 AM–4 PM) to prevent heat stress. Test your setup for 1-2 weeks before long-term use.
Do I need a special power source for indoor palm tree lights?
Not necessarily! Most LED string lights use battery packs (AA/AAA) or USB power, which are safe and convenient. For hardwired setups, use a surge protector near your palm. Avoid extension cords near water sources (like misting systems). Solar-powered lights are a great eco-friendly alternative if your palm gets some natural light.
Wrapping up and next steps
Transforming your space with an indoor palm tree with lights isn’t just about aesthetics—it’s about creating a cozy, vibrant atmosphere that feels like a tropical escape. Whether you’re drawn to the glowing foliage or the effortless ambiance, this project is your ticket to a stylish, low-maintenance upgrade.
Ready to make it happen? Grab your supplies, follow the steps, and let your creativity shine! 🌿✨
Start small—try a single lighted palm in your living room or bedroom, then expand as you gain confidence. Your future self (and your guests!) will thank you for the instant glow-up. What’s next? Pick your favorite palm variety, gather your tools, and get planting!