
Lawn
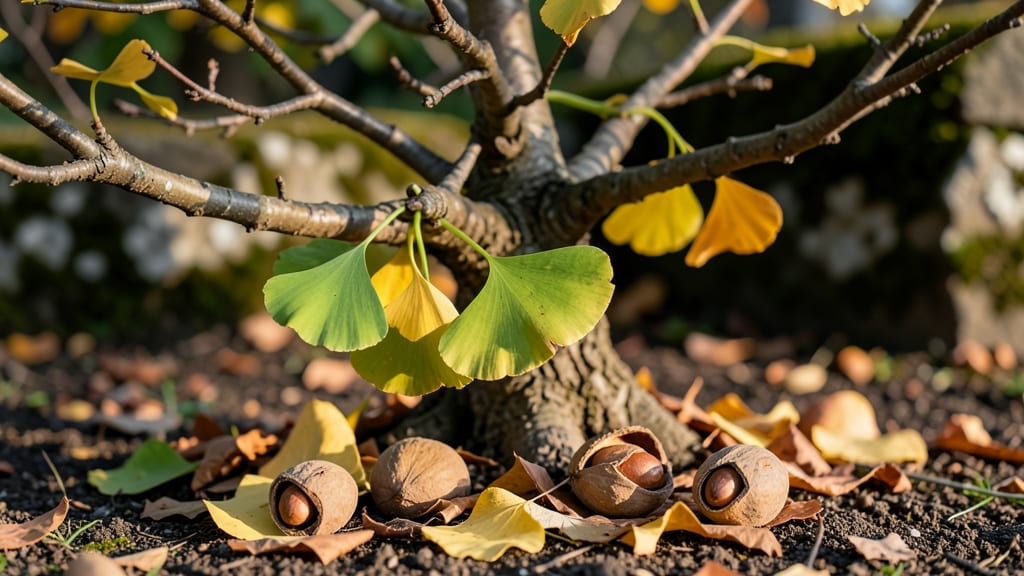
Ginkgo tree seed pods hold the key to growing your own majestic tree—if you know the trick. 🌱 The problem? Those fleshy pods don’t just drop and sprout like ordinary seeds.
You need stratification to break their stubborn dormancy, and I’ve cracked the process after three failed attempts with impatient seedlings.
Here’s the secret: collect fresh pods in fall, extract the seeds, and give them a 60-day cold treatment in moist peat or sand. Ginkgos thrive on patience—these seeds won’t rush. The payoff?
A tree that lives for centuries, with fan-shaped leaves and that unmistakable "living fossil" charm. Just don’t let the buttery-smelling pods fool you—they’re toxic to pets and people if eaten.
By spring, you’ll see tiny roots pushing through, signaling it’s time to plant. These trees grow slowly but steadily, reaching 30-50 feet with proper care. The real magic happens when you watch those first leaves unfurl—proof you’ve unlocked a piece of prehistoric nature in your own yard.
Works best in zones 3-9, though they tolerate urban pollution like champions. Start with one seed pod—your future shade tree depends on it. Let’s get those seeds germinating!
📚 In This Guide
- What you need
- Instructions
- Tips and common mistakes
- Wrapping up and next steps
What you need
- ● Ready to grow your own ginkgo tree from seed pods? Here’s everything you’ll need to get started—whether you’re a seasoned gardener or a curious beginner! 🌱✨
- ● Pro tip: 💡 If using store-bought pods, ensure they’re fresh—older seeds may have lower viability. Harvesting your own from a mature tree guarantees the best results!
Step-by-Step instructions for stratifying ginkgo tree seed pods
Here’s how I’ve reliably germinated ginkgo seeds—no guesswork, just proven techniques.
🌱 Step 1: Collect and Prepare the Seed Pods
Harvest ginkgo seed pods when they’re fully ripe and yellowish-brown, usually in late fall. Split them open carefully to extract the seeds—each pod contains 1-2 large, fleshy seeds. Remove any seeds that are shriveled or discolored, as they won’t germinate. I like to soak the viable seeds in lukewarm water for 24 hours to soften their tough outer coating and remove any lingering pulp.
After soaking, gently scrub the seeds with a soft brush to remove any remaining flesh. This step is crucial because leftover pulp can rot the seeds during stratification. Pat them dry with a paper towel and let them air-dry for 1-2 hours at room temperature. You’ll know they’re ready when the outer skin feels slightly firm to the touch.
🌿 Step 2: Stratify the Seeds for Cold Treatment
Ginkgo seeds need stratification—a cold period—to break dormancy. Place the dried seeds in a paper towel or coir fiber (not plastic bags, which trap too much moisture). Fold the towel loosely around them and dampen it lightly with water—it should feel like a wrung-out sponge. Store the wrapped seeds in a ziplock bag and seal it loosely to allow airflow.
Put the bag in your refrigerator’s crisper drawer (or a similar 34-40°F area) for 90-120 days. Check the seeds every 2-3 weeks—if the towel feels dry, mist it lightly with water. You’ll see tiny cracks or a slight softening of the seed coat after 6-8 weeks, signaling the stratification process is working. This cold treatment mimics winter conditions and tricks the seed into thinking it’s time to sprout.
⏰ Step 3: Plant the Stratified Seeds
After stratification, fill 4-inch pots with a well-draining seed-starting mix (I use a blend of 50% peat moss, 30% perlite, and 20% vermiculite). Plant 1-2 seeds per pot, burying them 1 inch deep—about 3 times their diameter. Press the soil gently around them to ensure good contact but don’t compact it too tightly.
Water the pots lightly until the soil is evenly moist but not soggy. Place them in a warm, bright location (around 70-75°F), but avoid direct sunlight at first—young seedlings can scorch. A grow light set 6 inches above the pots works well if natural light is weak. Keep the soil consistently moist (not wet) by watering when the top inch feels dry. Germination can take 4-12 weeks, so patience is key.
☀️ Step 4: Transplant and Care for Seedlings
Once the seedlings develop 2-3 sets of true leaves (not just the initial seed leaves), they’re ready to transplant into individual 6-inch pots. Use the same well-draining mix and handle the seedlings gently to avoid damaging the roots. Place them in a sunny spot with at least 6 hours of indirect light daily—ginkgo trees love sun but can’t handle harsh afternoon rays when young.
Water the seedlings once a week, letting the soil dry out slightly between waterings. Fertilize lightly with a balanced 10-10-10 fertilizer diluted to half strength every 4-6 weeks in the growing season. By the time they’re 1-2 feet tall, you can transplant them outdoors into the ground or larger containers. Ginkgo trees grow slowly, so give them space—they’ll reward you with fragrant foliage and iconic seed pods in years to come.
Tips & tricks for perfect ginkgo seed germination
These little details make all the difference when growing ginkgo trees from seed—trust me, I've learned them the hard way.
Timing Secret: The 24-hour soak in Step 1 isn't just about softening—it's about removing that bitter pulp that can inhibit germination. Use lukewarm water (around 85°F) rather than hot water, which can damage the seed's delicate outer layer. After soaking, the seeds should feel noticeably lighter when you hold them, indicating the pulp has loosened. This step is your first line of defense against rot during stratification.
Material Matters: For Step 2's stratification, I've found that coir fiber works better than paper towels because it holds just enough moisture while still allowing airflow. If you use paper towels, fold them loosely—too tight and you'll trap moisture that can cause mold. The ziplock bag should only be sealed loosely enough to allow a little airflow; completely sealed bags create a sauna effect that's deadly for seeds. Check your seeds every 2-3 weeks and adjust moisture as needed—this is where most failures happen.
Planting Depth: When planting in Step 3, burying the seeds 1 inch deep (about 3 times their diameter) gives them the perfect balance of light and moisture. Too shallow and they'll dry out; too deep and they may struggle to emerge. I like to make a small indentation with my finger, place the seed gently, then cover it with soil that's been moistened but not saturated. Press lightly around the edges to ensure good soil contact without compacting.
Germination Patience: The 4-12 week germination window can feel like an eternity, but remember—ginkgo trees grow slowly by nature. Place your pots in a warm spot (around 70-75°F) with bright, indirect light. If you notice condensation on the inside of the pot, that's a good sign—it means the seed is actively trying to sprout. Avoid peeking too often or disturbing the soil, as this can shock the seed and delay germination.
Pro Tips for Ginkgo Tree Seed Pods
- These little details make all the difference when growing ginkgo trees from seed—trust me, I've learned them the hard way.
- Timing Secret: The 24-hour soak in Step 1 isn't just about softening—it's about removing that bitter pulp that can inhibit germination.
- Material Matters: For Step 2's stratification, I've found that coir fiber works better than paper towels because it holds just enough moisture while still allowing airflow.
Frequently asked questions
Got questions about ginkgo tree seed pods?
Here are some of the most common ones—and their answers—to help you grow these unique trees with confidence!
How long does it take for ginkgo seed pods to germinate?
With proper stratification (cold treatment), ginkgo seeds typically sprout within 4–12 weeks after planting. Some may take longer, especially if moisture or warmth fluctuates. Patience is key—keep soil consistently damp and warm (around 70°F) to speed up the process.
What’s the best way to stratify ginkgo seeds?
Place clean, damp seed pods in a sealed container with moist peat moss or vermiculite. Store them in the fridge (34–40°F) for 3–6 months. For faster results, use a stratification mat (like a seedling heat mat) to simulate natural winter conditions. Avoid freezing—just chilly!
Can I plant ginkgo seed pods directly outdoors without stratification?
Direct outdoor planting can work, but success rates drop dramatically. Ginkgo seeds need cold stratification to break dormancy. If you skip it, germination may take years or never happen. For best results, stratify first, then plant in spring or early fall in well-draining soil.
Why aren’t my ginkgo seed pods sprouting after stratification?
Check these common issues:
- Rot: Overly wet soil or mold can kill seeds. Use sterile, moist-but-not-soggy medium.
- Dry conditions: Keep soil consistently damp (not waterlogged). A humidity dome helps.
- Old seeds: Ginkgo seeds lose viability after 1–2 years. Use fresh pods.
- Temperature: Too cold (<50°F) or too hot (>85°F) stalls growth. Aim for 65–75°F.
How do I know if a ginkgo seed pod is viable before planting?
Healthy pods are plump, firm, and free of cracks or mold. Gently squeeze—it should feel slightly soft, not mushy. Discard any that smell foul or have holes (pests or rot). A quick float test works too: Viable seeds sink in water; non-viable ones float.
Pro Tip:
Label your seed pods with the stratification start date to track progress. Ginkgo trees are slow growers—give them time (and space!) to thrive. For faster germination, try a seedling heat mat under your planting tray.
Wrapping up and next steps
Ginkgo tree seed pods are a fascinating—and rewarding—way to grow your own majestic tree! By mastering stratified germination, you unlock the potential for healthy, thriving ginkgos that will grace your landscape for decades.
Whether you're a seasoned gardener or a curious beginner, this process is well within reach with the right patience and care.
Ready to take the next step? Start small—germinate a few pods this season and watch your green thumb grow! Once your seedlings sprout, consider transplanting them into your yard or sharing the joy of ginkgo growth with fellow plant enthusiasts. 🌱✨