
Lawn
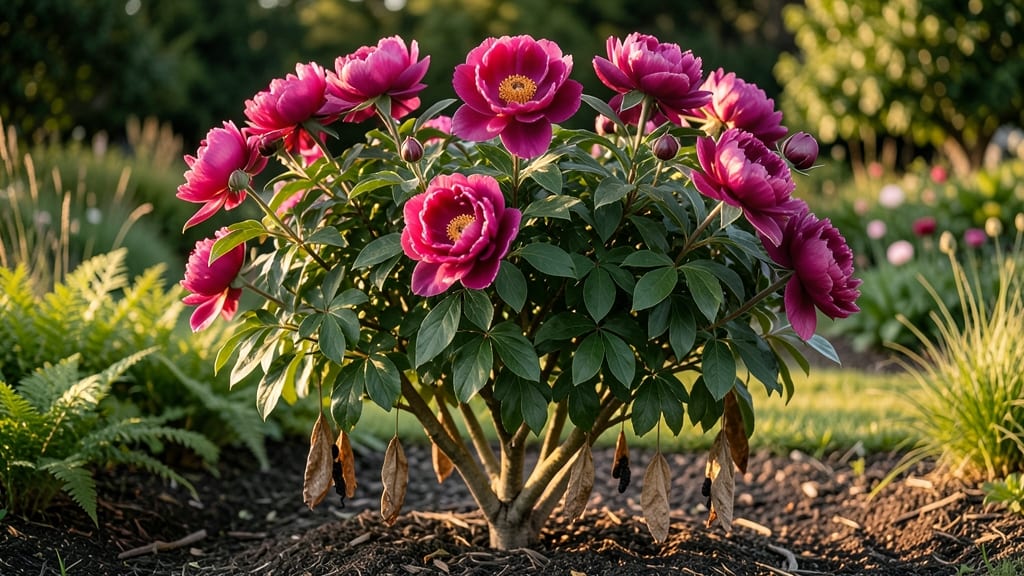
Tree peony seed pods hold the secret to growing these stunning shrubs from scratch—if you know the cold stratification tricks that break dormancy. 🌱 I’ve struggled with slow germination until I discovered how to mimic nature’s timing, and now my seedlings emerge strong within 8-12 weeks instead of waiting years.
The process starts with harvesting ripe pods in late fall, then storing them in damp sand or peat moss in the fridge for 3-4 months. This cold treatment tricks the seeds into thinking winter’s passed, so they’re ready to sprout when you plant them in spring.
Most gardeners skip this step and end up with years of waiting—or no germination at all. What you’ll get is a head start on growing rare tree peony varieties that aren’t available as cuttings.
The seedlings develop thick, sturdy stems and lush foliage, proving that patience and the right timing pay off. No more relying on expensive nursery plants when you can grow your own.
Works for both gardeners in cooler climates and those in milder zones who can extend stratification with a second cold period. Let’s get those pods ready for action!
📚 In This Guide
- What you need
- Instructions
- Tips and common mistakes
- Wrapping up and next steps
What you need
- ● Tree peony seed pods: 10–20 fresh, mature pods (harvested in late fall or early winter). Ensure they’re slightly wrinkled but not dried out.
- ● Potting mix: 1–2 gallons of well-draining, sterile mix (e.g., 50% peat moss, 30% perlite, 20% coarse sand). Avoid garden soil—it can harbor pathogens!
- ● Seed-starting trays or small pots: 6–12 shallow containers (3–4 inches deep) with drainage holes. Clear plastic or biodegradable pots work great.
- ● Cold stratification setup: Refrigerator (or cold frame): Set to 34–40°F (1–4°C).
- ● Plastic bag or airtight container: For moisture retention during stratification.
- ● Spray bottle: To keep seeds evenly moist.
- ○ Humidity dome or plastic wrap: Optional but helpful for maintaining humidity post-stratification.
- ● Pruners or sharp scissors: To carefully open seed pods without damaging seeds.
- ● Labeling tags: Waterproof markers or tags to label pots (e.g., "Tree Peony – Stratified 12/2023").
- ● Grow lights or sunny windowsill: For warmth (70–75°F or 21–24°C) after stratification.
- ○ Fungicide (optional): A mild solution like hydrogen peroxide (3%) to soak seeds if mold risks arise.
- ● Notebook/journal: To track stratification dates, moisture levels, and germination progress!
Step-by-step instructions for cold stratifying tree peony seed pods
Here’s how to break dormancy and jumpstart germination—without waiting years for nature to do it.
🌱 Step 1: Harvest and Prepare the Seed Pods
Collect mature tree peony seed pods when they turn brown and begin splitting open naturally, usually in late summer or early fall. You’ll know they’re ready when the outer shell cracks but the seeds inside remain intact. Gently twist or pry open the pods to release the seeds—don’t crush them, as the hard outer coating protects the embryo.
Place the seeds in a paper towel or breathable fabric (like an old cotton T-shirt) to absorb any moisture. This prevents mold while keeping them from drying out completely. Store them in a sealed container with a tiny hole for airflow—just enough to prevent condensation buildup.
❄️ Step 2: Cold Stratify for 3-4 Months
Refrigerate the sealed container in a standard fridge set to 35-40°F for 12-16 weeks. This mimics winter’s natural chilling period, breaking the seed’s dormancy. I like to label the container with the date and variety (if known) to track progress—tree peonies can be finicky, and consistency is key.
Check the seeds every 4-6 weeks to ensure no mold forms. If you spot fuzzy growth, open the container for a day to dry it out before resealing. The goal is cold and moisture—never soggy. After 120 days, the seeds should look plump and slightly softened compared to their original state.
🌱 Step 3: Sow Stratified Seeds in Moist Medium
Fill small pots (3-4 inches deep) with a sterile seed-starting mix—tree peonies hate dense soil. Moisten the mix until it’s damp but not dripping, then press each seed ½ inch deep into the soil. Space them 2 inches apart to avoid crowding, which leads to weak stems. A toothpick helps place them precisely without damaging the seed.
Cover the pots with plastic wrap or a humidity dome to retain moisture and warmth. Place them in a warm spot (65-70°F)—a sunny windowsill or under a grow light. Germination can take 4-12 weeks, so patience is critical. Watch for the first tiny green shoot breaking through the soil—this is your cue to remove the cover immediately to prevent rot.
☀️ Step 4: Transition to Light and Gradual Hardening
Once seedlings emerge, move them to bright, indirect light for 2-3 weeks to strengthen their stems. Avoid direct sun at first—young peony leaves burn easily. Rotate the pots quarter-turn daily so they grow straight, not lopsided. After 4-6 weeks, when seedlings have 2-3 true leaves, begin hardening by placing them outside in partial shade for 1 hour daily, gradually increasing time over 2 weeks.
Transplant outdoors only after the last frost, when soil temperatures stay above 50°F. Choose a spot with dappled shade—tree peonies despise harsh midday sun. Mulch heavily around the base to protect roots during their first winter, as they’re still fragile.
Tips & tricks for perfect tree peony seed pod stratification
These little-known tricks will help you bypass the years-long wait for natural germination.
Timing Secret: Start your 12-16 week stratification period in early winter (around January) to align with nature's cycle. This ensures seeds complete their cold treatment just as spring planting season begins. I mark my calendar with a red "X" on January 1st as my target start date—it's become my secret to consistent success. The 120-day window gives you flexibility if you miss the exact date, but starting earlier means you might need to delay planting until true spring arrives.
Storage Wisdom: For the 4-6 week mold checks during stratification, I use a small piece of clear packing tape to create a tiny ventilation hole in the container lid. This maintains airflow while keeping most of the container sealed—perfect for preventing moisture buildup. Place a rubber band around the tape to make it easy to remove when checking seeds. The hole should be just big enough to see inside without letting in enough air to dry out the seeds.
Seed Selection Tip: When harvesting pods in Step 1, look for seeds that are plump and firm rather than shriveled. The best seeds will have a slight sheen to their outer coating—this indicates good moisture content. I've found that selecting only the largest seeds (about ½ inch in diameter) gives me the highest germination rates. Smaller seeds often struggle to break dormancy, even with proper stratification.
Germination Rescue Strategy: If you notice seeds starting to mold during the 12-16 week period, don't panic—this is fixable. Remove all affected seeds immediately, then place the remaining seeds in a paper towel and spread them out on a clean surface. Let them dry completely (this might take 24 hours) before resealing the container. The key is catching mold early—once it spreads, even healthy seeds can become contaminated.
Pro Tips for Tree Peony Seed Pods
- These little-known tricks will help you bypass the years-long wait for natural germination.
- Timing Secret: Start your 12-16 week stratification period in early winter (around January) to align with nature's cy...
- Storage Wisdom: For the 4-6 week mold checks during stratification, I use a small piece of clear packing tape to crea...
Frequently asked questions
Got questions about tree peony seed pods? You’re not alone! Here are some of the most common queries—plus clear, practical answers to help you succeed.
Why do tree peony seeds need cold stratification?
Tree peony seeds (Paeonia ostii) have a hard, thick coat that blocks moisture and oxygen, preventing germination. Cold stratification (mimicking winter) breaks this dormancy by softening the seed coat and kickstarting metabolic activity. Without it, seeds may stay dormant for years—or never sprout at all! Think of it as a natural "reset button" for the seed’s growth cycle.
How long should I stratify tree peony seeds?
Most gardeners recommend 4–6 months of cold stratification for tree peony seeds. Place them in a moist medium (like damp sand or peat moss) in the fridge (34–40°F) or outdoors in a protected spot. Pro tip: If you’re impatient, some growers use a 3-month cold period followed by a warm spell to speed up germination. Just monitor for mold—if it appears, reduce moisture slightly.
Can I collect tree peony seed pods from my garden?
Harvest seed pods when they turn brown and papery (usually late summer to early fall). Let them dry indoors for 1–2 weeks, then crack them open to remove the seeds. Warning: Some pods may contain shriveled or empty seeds—discard those and focus on plump, firm seeds for the best germination rates.
What if my seeds don’t germinate after stratification?
Don’t panic! Tree peony seeds are notoriously slow—some take 6 months to 2 years to sprout. If your seeds still won’t germinate, try these fixes:
- Check moisture: Keep the medium consistently damp (not soggy).
- Test viability: Soak seeds in warm water for 24 hours—if they float, they’re likely non-viable.
- Adjust temperature: Some seeds need a warm period (70°F) after cold stratification to trigger germination.
Are there alternatives to cold stratification for tree peony seeds?
While cold stratification is the most reliable method, you can experiment with:
- Nick or scarify seeds: Lightly scratch the seed coat with sandpaper or a knife to help water penetrate.
- Use a germination aid: Soak seeds in hydrogen peroxide (3%) for 24 hours before stratification.
- Sow outdoors in fall: Plant seeds directly in the ground after harvest—they’ll naturally stratify over winter.
Wrapping up and next steps
Discovering the secrets of tree peony seed pods and their cold stratification needs can turn your gardening dreams into blooming reality! 🌱 With patience, the right materials, and a little chilly persistence, you’ll soon see those delicate seeds sprout into stunning peonies. Ready to give it a try?
Your next step? Gather your supplies—whether it’s a freezer, a damp paper towel, or a snowy outdoor spot—and start your stratification journey today. Happy gardening, and may your peony patch flourish! 🌸