
Tools
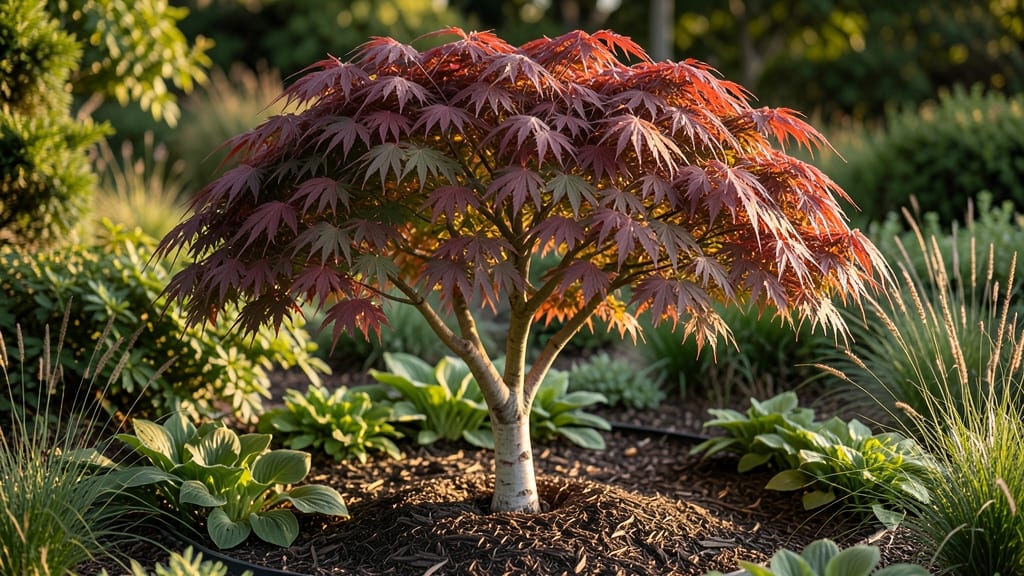
A tree garden bed that doubles as a privacy screen transforms your yard from ordinary to extraordinary. 🌳 I designed mine last spring after years of struggling with flimsy fences and unsightly chain-link—now it’s a living wall of texture and color that works year-round.
The key is choosing the right mix of trees and shrubs that grow at different rates. Fast growers like arborvitae or Leyland cypress create instant height, while slower-growing flowering cherries add seasonal interest.
Proper spacing (6-12 feet apart for mature trees) prevents root competition and ensures your screen stays lush without overcrowding. You’ll end up with a layered, ever-changing backdrop that provides shade in summer, winter interest with bark and berries, and even privacy for your patio.
The best part? It’s a one-time investment that pays dividends for decades—no replacing panels or painting every few years. Works for any yard size, from narrow city lots to expansive suburban properties. Let’s get your privacy screen growing!
📚 In This Guide
- What you need
- Instructions
- Tips and common mistakes
- Wrapping up and next steps
What you need
- ● Container or Planter: Choose a sturdy, weather-resistant wooden, metal, or fabric planter (e.g., 4’–6’ tall, 12”–18” deep). Dimensions depend on tree size—smaller trees (e.g., Dwarf Alberta Spruce) fit 12”–18” wide; larger shrubs (e.g., Boxwood) need 24”+ width.
- ● Soil: High-quality potting mix (1–2 bags, 2–3 cubic feet) with good drainage (add perlite or sand if needed). Avoid garden soil—it compacts!
- ● Privacy Trees/Shrubs: Evergreens (year-round): 3–5 dwarf conifers (e.g., Thuja occidentalis ‘Smaragd’, Picea pungens ‘Glauca Globosa’) or boxwoods (1–3 plants per 4’ of height).
- ● Deciduous Fillers (seasonal color): 2–3 ornamental grasses (e.g., Carex spp.) or flowering shrubs (e.g., Abelia, Hydrangea).
- ● Mulch: Organic mulch (e.g., shredded bark, pine needles) to retain moisture and suppress weeds (1–2 bags).
- ● Fertilizer: Slow-release granular fertilizer (10-10-10 or organic options like compost) for planting.
- ● Garden Gloves (1 pair) – Protect your hands from thorns and soil.
- ● Trowel or Spade – For digging and planting (medium-sized, 6”–8” blade).
- ● Watering Can or Hose with Nozzle – Gentle watering is key for young plants!
- ● Measuring Tape – Ensure even spacing between plants (aim for 12”–18” apart).
- ● Level – Keep your planter straight and stable.
- ○ Drill & Screws (Optional) – If assembling a wooden planter.
- ● Sunlight Assessment: Confirm your space gets full sun (6+ hrs/day), partial shade (3–6 hrs), or full shade—this dictates plant choices!
- ● Drainage Plan: Ensure your planter has drainage holes (or add a layer of gravel at the bottom if DIY-ing).
- ○ Support Structure (Optional): For heavy planters, add feet or brackets to secure them to walls/fences.
Step-by-Step instructions for creating a tree garden bed
Here's how to build a lush, functional privacy screen that thrives year-round.
🪴 Step 1: Plan and Prepare the Bed Layout
Start by sketching your design on paper, marking the 4-foot-wide bed where you want it—this width allows enough space for mature trees while keeping maintenance manageable. Measure your space carefully, as trees need 6-10 feet apart for proper airflow and growth. I like to outline the bed with landscape fabric first to suppress weeds before planting.
Dig the bed area to a depth of 12 inches, loosening the soil to encourage root growth. Amend the soil with 2-3 inches of compost mixed into the top 6 inches—this improves drainage and provides nutrients for your young trees. If your soil is heavy clay, add 1 part perlite to 3 parts soil to lighten it up.
🌱 Step 2: Select and Plant the Trees
Choose a mix of evergreen and deciduous trees for year-round privacy. I recommend 4-6 trees per bed, spacing them 6 feet apart for a balanced look. Evergreens like arborvitae or emerald green holly provide winter coverage, while deciduous trees like serviceberry or dogwood add seasonal interest. Dig holes twice as wide as the root ball but no deeper.
Place each tree in its hole, ensuring the root flare (where roots meet the trunk) sits just above soil level. This prevents the trunk from sitting too deep, which can suffocate roots. Backfill with native soil, tamping gently to remove air pockets. Water deeply to settle the soil around the roots—you’ll know it’s right when water drains evenly without pooling.
☀️ Step 3: Mulch and Maintain for Long-Term Growth
Spread 3 inches of mulch around each tree, keeping it 6 inches away from the trunk to prevent rot. Use shredded bark or wood chips for a natural look. Mulch helps retain moisture, suppress weeds, and regulate soil temperature—critical for young trees still establishing roots. Replenish mulch annually in early spring as it breaks down.
Water deeply once a week for the first year, providing 1-2 gallons per tree to encourage deep root growth. Avoid overhead watering, which can spread disease. After the first year, trees will need water only during dry spells. Prune in late winter or early spring to shape the trees and remove dead or crossing branches—this keeps them healthy and encourages fuller growth.
🌿 Step 4: Add Understory Plants for Year-Round Interest
Fill the gaps between trees with perennial shrubs or ornamental grasses to create a dense, layered look. I like using boxwood, hydrangeas, or dwarf conifers for structure, along with ferns or hostas for texture. These plants thrive in partial shade and won’t compete with the trees for resources. Plant them 12-18 inches apart for a full, lush appearance.
Fertilize lightly in early spring with a balanced, slow-release fertilizer to support growth without overstimulating the trees. Avoid high-nitrogen fertilizers, which can lead to excessive leaf growth at the expense of root development. Monitor the bed regularly for pests or diseases—catching issues early keeps your privacy screen thriving for years.
Tips & tricks for perfect tree garden beds
Creating a stunning privacy screen takes planning—and these small details make all the difference between a good design and a truly thriving one.
Soil Preparation is Everything: Don't skip the 12-inch deep dig in Step 1—this ensures roots have room to establish without crowding. If your soil is particularly compacted, rent a rototiller for the first 6 inches to break up clay layers. I've found that adding compost only to the top 6 inches (as instructed) prevents nutrient loss while still improving drainage throughout the entire 12-inch zone. The perlite-to-soil ratio for clay soils (1:3) is perfect—it lightens the texture without overwhelming the native soil structure.
Root Flare Matters More Than You Think: When planting in Step 2, use a small shovel or stick to mark where the root flare should sit—just above soil level. Many beginners bury this junction too deep, which strangles the tree. A good test is to look for the point where roots spread outward from the trunk like a skirt. This is your visual cue for proper placement. The deep watering afterward (until it drains evenly) confirms you've done it right.
Mulch Maintenance is Non-Negotiable: That 3-inch layer of mulch in Step 3 needs refreshing every spring because it breaks down completely within a year. I've seen beds where mulch was only replenished every 2-3 years—those trees struggle with moisture retention and weed competition. Keep mulch 6 inches away from trunks to prevent rot, and consider adding a thin layer of landscape fabric under the mulch if you have persistent weed issues. This creates a clean barrier without harming the soil.
Layering Plants Creates Density: The 12-18 inch spacing for understory plants in Step 4 might seem generous, but it's crucial for their development. Tight spacing leads to competition where some plants get crowded out. For maximum impact, plant taller shrubs (like boxwood) toward the back of the bed and shorter ones (like hostas) toward the front. This creates that lush, layered look while maintaining airflow between all plants.
Pro Tips for Tree Garden Bed
- Creating a stunning privacy screen takes planning—and these small details make all the difference between a good design and a truly thriving one.
- Soil Preparation is Everything: Don't skip the 12-inch deep dig in Step 1—this ensures roots have room to establish without crowding.
- Root Flare Matters More Than You Think: When planting in Step 2, use a small shovel or stick to mark where the root flare should sit—just above soil level.
Frequently asked questions
Got questions about creating your own tree garden bed? You're not alone! Here are some of the most common queries—plus straightforward answers to help you get started with confidence.
What’s the best time of year to plant a tree garden bed?
The ideal time to plant is early spring or fall when temperatures are mild, and the ground isn’t frozen. This gives roots time to establish before extreme heat or cold. Avoid planting in summer—drought stress can stunt growth! If you’re in a warm climate, late fall or winter can also work.
How much water do these trees need?
Newly planted trees need 1–2 inches of water per week (including rainfall). Water deeply 2–3 times per week for the first month, then taper off as roots establish. Mature trees are more drought-tolerant but still benefit from occasional deep watering. Mulch helps retain moisture—just keep it 2–4 inches away from the trunk.
Can I use shrubs instead of trees for a privacy screen?
Shrubs like boxwood, privet, or arborvitae are great alternatives for faster privacy (3–5 years vs. 5–10 for trees). However, trees offer year-round height and structural diversity. Mixing both can create a layered, lush look. Just ensure your shrubs are spaced 3–5 feet apart for full coverage.
Why aren’t my trees growing as expected?
Slow growth often stems from poor soil, over/under-watering, or pests. Check drainage—waterlogged roots suffocate plants. Test soil pH (most trees prefer 6.0–7.5). Yellow leaves? Too much water. Brown edges? Not enough. Inspect for aphids or spider mites and treat with neem oil if needed. Patience helps—trees grow slowly but steadily!
How close can I plant trees to my house or fence?
Keep trees 3–5 feet away from structures to avoid root damage or foundation issues. Check your tree’s mature width (listed on tags)—some, like willows, spread aggressively. For fences, allow at least 6 feet if you want unobstructed growth. Always research your species’ space needs before planting!
Wrapping up and next steps
A tree garden bed isn’t just a stylish addition to your yard—it’s a functional, low-maintenance privacy screen that brings year-round beauty to your outdoor space. With the right plants, design, and care, you can enjoy lush greenery, seasonal blooms, and even edible harvests while keeping your space cozy and private.
Ready to transform your outdoor area? Start by sketching your design, gathering your materials, and planting with confidence. Whether you’re a gardening pro or a beginner, every step brings you closer to a serene, green sanctuary you’ll love spending time in! 🌿✨