
Pruning
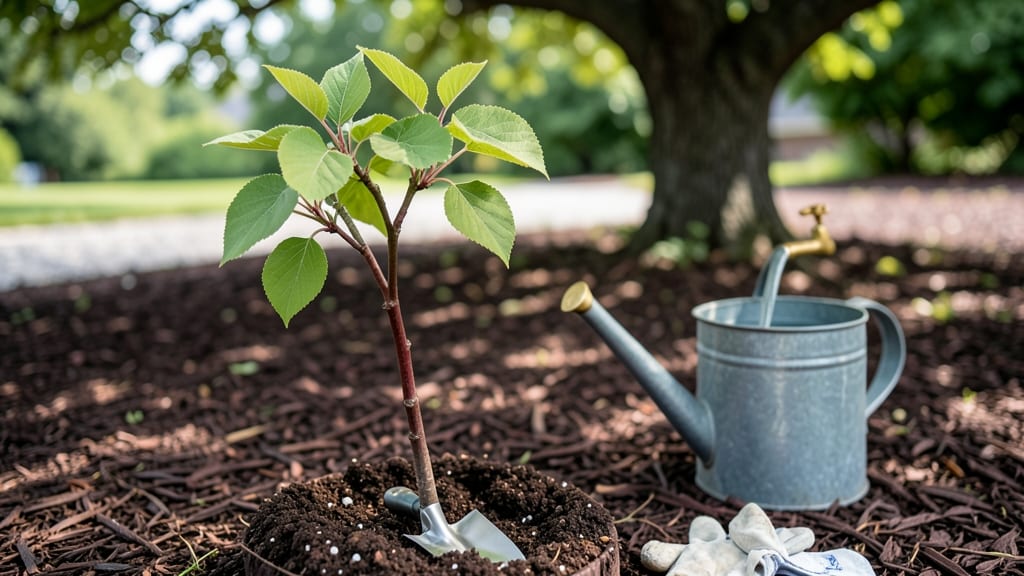
Growing redbud tree saplings means spring blooms that turn your yard into a pink cloud. 🌸 I’ve planted these cold-hardy beauties for years, and the key to their success starts long before the first blossom appears—it’s all in the soil prep and early care.
These saplings thrive in full sun to partial shade, but their roots need well-draining soil mixed with compost. Water deeply once a week after planting, then let nature take over—they’re drought-tolerant once established.
The first year is about building strong roots, not flashy flowers, so resist the urge to fertilize heavily. By spring, you’ll see those iconic pink blooms before the leaves even emerge, and the tree will keep its elegant shape year-round.
Redbuds handle cold down to zone 4, making them perfect for northern climates too. Common mistakes? Planting too deep or crowding saplings too close together. Give them space—they’ll reward you with decades of color and minimal fuss.
📚 In This Guide
- What you need
- Instructions
- Tips and common mistakes
- Wrapping up and next steps
What you need
- ● Redbud tree saplings (1–5, depending on your space; choose Cercis canadensis varieties like ‘Rubra’ or ‘Forest Pansy’ for extra color).
- ● Well-draining soil mix (50% native soil + 50% compost or potting mix for containers).
- ● Organic mulch (2–3 inches of shredded bark or wood chips to retain moisture).
- ● Slow-release fertilizer (10-10-10 or a balanced organic option, ~1 lb per tree).
- ● Watering can or hose with a gentle spray nozzle (for deep, even hydration).
- ● Garden trowel or spade (for planting; 6–8 inches deep).
- ● Pruning shears (bypass-style, sharp and sterilized to avoid disease).
- ● Gloves (gardening or work gloves for protection).
- ● Measuring tape (to space saplings 10–15 feet apart for mature growth).
- ○ Staking kit (optional) (for young saplings in windy areas; use 3–4 ft bamboo stakes).
- ● Burlap or frost cloth (for wrapping saplings in late fall/winter if temps drop below 10°F).
- ● Anti-desiccant spray (like Wilt-Pruf to protect leaves in dry winter air).
- ○ Thermometer (optional) (to monitor soil temps—ideal planting range: 40–60°F).
Step-by-Step instructions for planting and caring for redbud tree saplings
Here's how to give your redbud saplings the best start for stunning spring blooms and lasting resilience.
🌱 Step 1: Choose the Perfect Planting Location
Redbuds thrive in full sun to partial shade, with at least 4-6 hours of direct sunlight daily. I always look for spots with well-draining soil—redbuds hate soggy roots. A slight slope or raised bed helps prevent water pooling around the base.
Check the mature height of your sapling (typically 20-30 feet) and plant at least 15 feet from structures or other trees. This gives roots room to spread and prevents future crowding. If your yard has heavy clay soil, amend with 2-3 inches of compost mixed into the top 12 inches of soil.
🪴 Step 2: Dig and Plant with Proper Spacing
Dig a hole twice as wide as the sapling's root ball but no deeper—redbuds struggle when planted too low. Gently loosen the roots if they're circling the root ball, then place the sapling in the center so the top of the root ball sits 1-2 inches above ground level. This prevents water from pooling at the stem.
Backfill with native soil mixed with a handful of slow-release fertilizer (like 10-10-10). Water deeply to settle the soil, then add a 2-inch layer of mulch (like wood chips) around the base, keeping it 3 inches away from the trunk. This protects roots from temperature swings while keeping moisture even.
☀️ Step 3: Water Deeply and Establish a Routine
Water your redbud 2-3 times per week for the first month, giving 1-2 gallons per watering until the soil is moist 12 inches deep. You'll know it's right when water drains through the bottom of the hole. After that, water once a week during dry spells, aiming for deep, infrequent watering—this encourages strong root growth.
Here's the thing—redbuds are drought-tolerant once established, but young saplings need consistency. I check soil moisture by sticking my finger 2 inches down—if it feels dry, it's time to water. Avoid wetting the leaves to prevent fungal diseases like powdery mildew.
✂️ Step 4: Prune for Shape and Health
Wait until late winter or early spring (just before buds swell) to prune your redbud. Remove any dead, diseased, or crossing branches first, then shape the tree by cutting back to just above a healthy bud. Redbuds bloom on old wood, so never prune after mid-summer—you'll lose next year's flowers.
I like to keep the natural vase shape by thinning out crowded branches. Use clean, sharp pruners to make cuts at a 45-degree angle just outside the branch collar. Sealed wounds heal better and look more natural. Avoid heavy pruning—redbuds respond best to gradual shaping over time.
⏰ Step 5: Protect and Maintain for Long-Term Beauty
Young redbuds benefit from a light burlap wrap during their first winter to shield against harsh winds and temperature swings. Remove it in early spring once new growth starts. Fertilize lightly in early spring with a balanced 10-10-10 formula, but skip fertilizer in the first year if your soil was amended properly.
Watch for pests like aphids or borers—redbuds are generally pest-resistant, but a strong spray of water usually clears minor infestations. Mulch annually in early spring to replenish nutrients and suppress weeds. With proper care, your redbud will reward you with vibrant pink blooms in early spring for decades.
Tips & tricks for perfect redbud tree saplings
These practical insights will help you avoid common pitfalls and maximize your redbud's potential for vibrant spring blooms.
Location Intelligence: Pay attention to microclimates in your yard—south-facing slopes get more sun, while north-facing areas stay cooler. If your yard has heavy shade, choose a spot where the redbud will get at least 4-6 hours of morning sun, which is gentler on young leaves. I've seen redbuds planted in full shade struggle to develop their signature pink blooms, so don't skimp on sunlight exposure.
Root Ball Rescue: When you're loosening circling roots in Step 2, be gentle but thorough—cut through any roots that have wrapped around the root ball more than twice. This prevents girdling as the tree matures. I've had to dig up redbuds later because the roots had strangled themselves during planting. Use a clean knife or your fingers to carefully separate these roots before planting.
Watering Wisdom: The 2-3 times per week watering schedule in Step 3 works best when done consistently at the same time each day. Morning watering prevents fungal issues from overnight moisture, while evening watering can lead to damp leaves. I set a reminder on my phone for 8 AM watering days to maintain this routine. Also, use a rain gauge to measure your watering—1-2 gallons might sound like a lot, but sandy soils drain faster than clay.
Pruning Precision: In Step 4, when making those 45-degree cuts, think of the branch collar as your guide. This is the swollen area where the branch meets the trunk—never cut into it. I like to use a small paint marker to trace where I'll cut before making the actual snip. This helps me visualize the clean, natural look and ensures I'm cutting in the right spot every time.
Pro Tips for Redbud Tree Saplings
- These practical insights will help you avoid common pitfalls and maximize your redbud's potential for vibrant spring blooms.
- Location Intelligence: Pay attention to microclimates in your yard—south-facing slopes get more sun, while north-facing areas stay cooler.
- Root Ball Rescue: When you're loosening circling roots in Step 2, be gentle but thorough—cut through any roots that have wrapped around the root ball more than twice.
Frequently asked questions
Got questions about growing redbud tree saplings? You’re not alone! Whether you’re a first-time gardener or a seasoned landscaper, these answers will help you nurture vibrant, cold-hardy trees with ease. Let’s dive in:
What’s the best time of year to plant redbud tree saplings?
Plant your saplings in early spring or fall—when soil is workable but not frozen. Avoid extreme heat or drought. Early spring (March-April) gives roots time to establish before summer, while fall (September-October) lets them settle before winter. Pro tip: Water deeply after planting to reduce transplant shock!
How cold-hardy are redbud trees, and do saplings need winter protection?
Most redbud varieties (like Cercis canadensis) tolerate USDA Zones 4-9. Young saplings benefit from a 3-4 inch layer of mulch around the base to insulate roots. Wrap the trunk with burlap if your winter dips below -20°F to prevent sunscald. Pro tip: Avoid heavy snow buildup on branches—gently brush it off!
Why aren’t my redbud saplings growing? Troubleshooting slow growth
Slow growth often stems from poor drainage, compacted soil, or over/under-watering. Check for:
- Watering: Keep soil consistently moist but not soggy (1 inch/week).
- Sunlight: Redbuds thrive in full sun (6+ hours/day)—move saplings if shaded.
- Soil: Amend heavy clay with compost or sand for better aeration.
Can I grow redbud trees from seed instead of buying saplings?
Yes, but saplings are faster and more reliable. Seeds take 1-2 years to germinate and may not inherit the parent tree’s vibrant colors. If you try seeds:
- Stratify seeds (refrigerate in moist sand for 60 days).
- Plant in well-draining soil and keep moist.
- Transplant seedlings to permanent spots when they’re 12+ inches tall.
Are redbud trees prone to pests or diseases? How to prevent issues
Redbuds are generally low-maintenance, but watch for:
- Japanese beetles (chew leaves)—handpick or use neem oil.
- Fungal issues (like powdery mildew)—improve airflow and avoid overhead watering.
- Deer/browsing—use repellents or protective fencing for young saplings.
Wrapping up and next steps
Growing redbud tree saplings is a rewarding way to add vibrant color and resilience to your landscape—no matter the season! 🌸 With the right pruning techniques, sunlight, and soil prep, these cold-hardy beauties thrive year-round. Start small, stay consistent, and watch your garden transform into a stunning, low-maintenance masterpiece.
Ready to take the next step? Plant your saplings this fall for early spring blooms, or consult local experts for region-specific care tips. Your future redbud grove awaits—let’s make it happen!