
Pruning
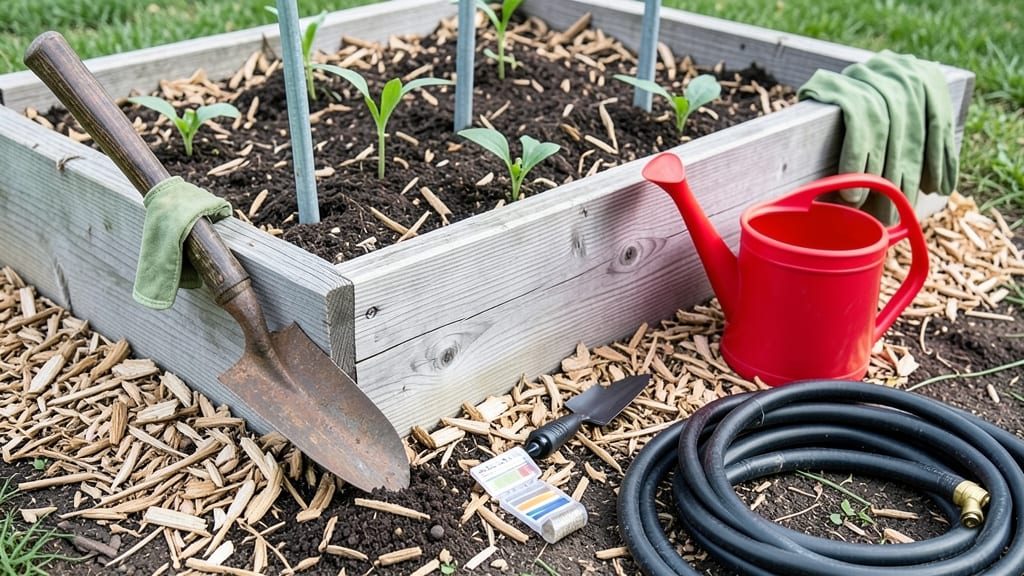
Planting trees in raised beds unlocks a world of possibilities for small spaces and urban gardens. 🌳 The key isn't just picking the right tree—it's creating a layered soil environment that mimics natural forest conditions, where roots spread freely and nutrients stay abundant.
I learned this the hard way after watching my first raised-bed apple tree struggle in compacted soil, but now my dwarf peach thrives with just a few strategic adjustments.
You'll need a deep raised bed (at least 24 inches deep) to accommodate root systems, a mix of topsoil, compost, and coarse sand for drainage, and trees suited for container-like conditions like dwarf fruit varieties or ornamental trees with shallow roots.
The soil layers should include a bottom layer of gravel or broken pots for drainage, followed by a mix of native soil, compost, and organic matter to feed roots over time.
When planting, position the tree so the root flare sits just above the soil line—never bury it—and space multiple trees at least 6-8 feet apart to prevent root competition. Water deeply after planting, then mulch heavily to retain moisture and regulate temperature.
With proper care, your raised-bed trees will grow just as strong as their in-ground counterparts, often producing fruit faster due to the controlled environment.
For long-term success, monitor soil moisture and top-dress with compost annually. Prune in late winter to shape growth and remove dead branches, and watch as your raised bed becomes a thriving mini-orchard or shade garden. The best part? You'll never need heavy machinery or worry about soil compaction again.
📚 In This Guide
- What you need
- Instructions
- Tips and common mistakes
- Wrapping up and next steps
What you need
- ● Raised bed kit or lumber: Untreated cedar, redwood, or composite wood (rot-resistant)
- ● Dimensions: Minimum 3’ x 3’ x 12” deep (or larger for mature trees)
- ● Quantity: 4–6 boards (2x6 or 2x8, depending on height)
- ● Staple gun or screws/nails: Galvanized or deck screws (2.5–3” long)
- ● Landscape fabric: 1 piece (slightly larger than bed base)
- ● Soil mix: 50% topsoil (high-quality, organic)
- ● 30% compost (well-aged, weed-free)
- ● 20% perlite or coarse sand (for drainage)
- ● Tree(s): Container-grown or bare-root saplings (size depends on species)
- ● Check root ball depth—should fit comfortably in the bed
- ○ Mulch: 2–3 inches of wood chips or straw (optional but recommended)
- ● Drip irrigation kit (for consistent moisture)
- ● Soil pH test kit (to tailor amendments)
- ● Tree stakes & ties (for young, top-heavy trees)
- ● Biochar or worm castings (for nutrient boost)
- ● Garden gloves & knee pads (because comfort matters!)
Step-by-Step instructions for raised bed tree planting
Here's how to create the perfect layered soil environment for thriving trees in raised beds.
🌱 Step 1: Select and Prepare Your Raised Bed Site
Choose a location with at least 6 hours of sunlight daily—most fruit and nut trees need full sun to develop properly. I always test the spot by placing a ruler vertically in the ground; if the depth is less than 12 inches of usable soil, a raised bed is your best option. Clear the area of weeds and rocks, then level the ground to create a stable base.
For a 4-foot wide bed, I use 2x6 or 2x8 lumber to build walls that are 12-18 inches tall. This height gives roots room to grow without competing with surrounding soil. Line the bottom with cardboard or landscape fabric to prevent weeds from invading while still allowing water drainage.
🪴 Step 2: Build the Perfect Layered Soil Structure
The secret to raised bed tree success lies in the layers. Start with a 4-inch base layer of coarse wood chips or gravel for drainage—this prevents waterlogging, which can suffocate roots. Next, add a 6-inch layer of composted leaves or straw to improve soil structure and retain moisture.
For the top 8-12 inches, blend equal parts of topsoil, compost, and aged manure. I like to mix in a handful of mycorrhizal fungi at this stage to boost root health. Avoid fresh manure—it burns roots and can introduce harmful pathogens. Water each layer thoroughly before adding the next to settle everything.
☀️ Step 3: Plant Trees at the Right Depth and Spacing
Dig a hole just wide enough to accommodate the root ball but no deeper than the container's base—planting too deep can suffocate the roots. For a 4-foot bed, space trees 10-15 feet apart if they're mature specimens, or 6-8 feet apart for smaller varieties. Remove the tree from its container and gently loosen the roots if they're circling.
Place the tree in the hole so the top of the root ball sits 1-2 inches above the bed's surface. This ensures the soil level won't settle and bury the trunk over time. Backfill with the remaining soil mix, pressing lightly to remove air pockets. Water deeply until moisture reaches 6 inches down—you'll see water pooling at the surface before it drains.
💧 Step 4: Mulch and Water for Long-Term Growth
Spread a 3-inch layer of organic mulch (like shredded bark or straw) around the base of the tree, keeping it 6 inches away from the trunk to prevent rot. Mulch conserves moisture and regulates soil temperature, which is especially important in raised beds that heat up faster. Replenish the mulch annually as it breaks down.
Water the tree 1-2 times weekly for the first 6 months, ensuring the soil stays moist but not soggy. You'll know it's right when the top 2 inches of soil feel damp but not waterlogged. After establishment, most trees need water only during dry spells—watch for wilting leaves as your signal to water deeply.
✂️ Step 5: Prune and Monitor for Healthy Growth
Prune young trees in late winter or early spring to remove any dead, crossing, or diseased branches. I always use sterilized pruning shears to prevent spreading pathogens. Cut just above a bud or branch junction, and avoid leaving stubs—this encourages clean healing. For the first year, focus on shaping the tree rather than heavy pruning.
Monitor the tree's progress by checking the soil moisture weekly and inspecting leaves for pests or disease. Yellowing leaves often signal overwatering or nutrient deficiency, while brown edges can mean underwatering. Adjust your care routine based on what you observe—raised beds dry out faster, so you may need to water more frequently than in-ground plantings.
Tips & tricks for perfect raised bed tree planting
Between us, these layered soil strategies will set your trees up for long-term success—avoiding the common mistakes that sabotage even well-meaning gardeners.
Layering Logic: When building your 4-inch drainage layer in Step 2, use slightly larger gravel than wood chips at the very bottom. This creates a "percolation zone" that prevents clogging over time, especially important in raised beds where water drains faster. I've seen gardeners skip this and end up with soggy bottom layers that suffocate roots—don't make that mistake.
Root Ball Rescue: If you notice circling roots when removing trees from containers in Step 3, here's what nobody tells you—gently tease them apart with your fingers, but don't force it. For stubborn cases, soak the root ball in water for 10 minutes first to make the roots more pliable. This prevents root damage that can stress your tree for years.
Watering Wisdom: That 6-inch deep watering in Step 3 isn't just about saturation—it's about breaking up the soil around the roots. Use a trowel to gently loosen the soil after watering to create air pockets. This mimics natural soil conditions and prevents compaction that stunts root growth. Think of it as giving your tree's roots their first deep breath.
Mulch Mastery: The 3-inch mulch layer in Step 4 should always be kept 6 inches away from the trunk—but here's the pro move: create a small "mulch volcano" around the base, sloping down toward the edges. This directs water toward the roots during heavy rains while preventing rot. I've seen too many gardeners pile mulch right against the trunk, which leads to fungal issues.
Pro Tips for Raised Bed Tree Planting
- Between us, these layered soil strategies will set your trees up for long-term success—avoiding the common mistakes that sabotage even well-meaning gardeners.
- Layering Logic: When building your 4-inch drainage layer in Step 2, use slightly larger gravel than wood chips at the very bottom.
- Root Ball Rescue: If you notice circling roots when removing trees from containers in Step 3, here's what nobody tells you—gently tease them apart with your fingers, but don't force it.
Frequently asked questions
Got questions about transforming your raised beds into thriving tree havens? Here are some of the most common concerns—and their answers—to help you plant with confidence!
Can I plant any tree in a raised bed?
Not all trees thrive in raised beds! Opt for smaller varieties like dwarf fruit trees (e.g., apple, peach), ornamental trees (e.g., Japanese maple), or shallow-rooted species like dwarf citrus. Avoid large trees—their roots need deep, expansive space. Always check the tree’s mature size and root depth before planting!
When is the best time to plant trees in a raised bed?
Spring (after the last frost) or early fall (4–6 weeks before the first frost) are ideal. These seasons give roots time to establish before extreme weather. Avoid planting in summer heat or winter—roots struggle in soil temperature extremes and can dry out or freeze.
How often should I water a tree in a raised bed?
Water deeply 2–3 times per week for the first year, ensuring the soil stays moist but not soggy. Raised beds dry out faster than ground soil! Use a drip irrigation system or soaker hose to deliver water slowly at the root zone. Mulch (2–3 inches) helps retain moisture and regulate temperature.
Why is my raised bed tree’s leaves turning yellow?
Yellow leaves often signal overwatering, nutrient deficiency, or poor drainage. Check the soil—it should feel like a damp sponge, not muddy. Amend with compost or organic fertilizer if nutrients are lacking. If the bed drains poorly, add perlite or coarse sand to improve aeration. Fungal issues? Reduce watering and ensure airflow around the tree.
Can I use a raised bed for bonsai trees?
Yes! Raised beds are perfect for bonsai—just keep them shallow (6–12 inches deep) and wide enough for root pruning. Use a well-draining mix (e.g., akadama, pumice, and lava rock) and ensure the bed has drainage holes. Bonsai thrive in controlled environments, so raised beds offer easy access for pruning and styling!
Wrapping up and next steps
Planting trees in raised beds unlocks a world of possibilities—healthier roots, faster growth, and stunning landscapes—all with the right layered soil strategy. Whether you’re a beginner or a seasoned gardener, the key is patience, preparation, and a little creativity.
Now that you’re armed with the secrets to root success, it’s time to roll up your sleeves and transform your garden into a thriving forest oasis!
🌱 Your Next Step:
- Pick your tree (or trees!) and mark your spot in the raised bed.
- Grab your tools and start layering—your future shade or fruit will thank you!