
Pruning
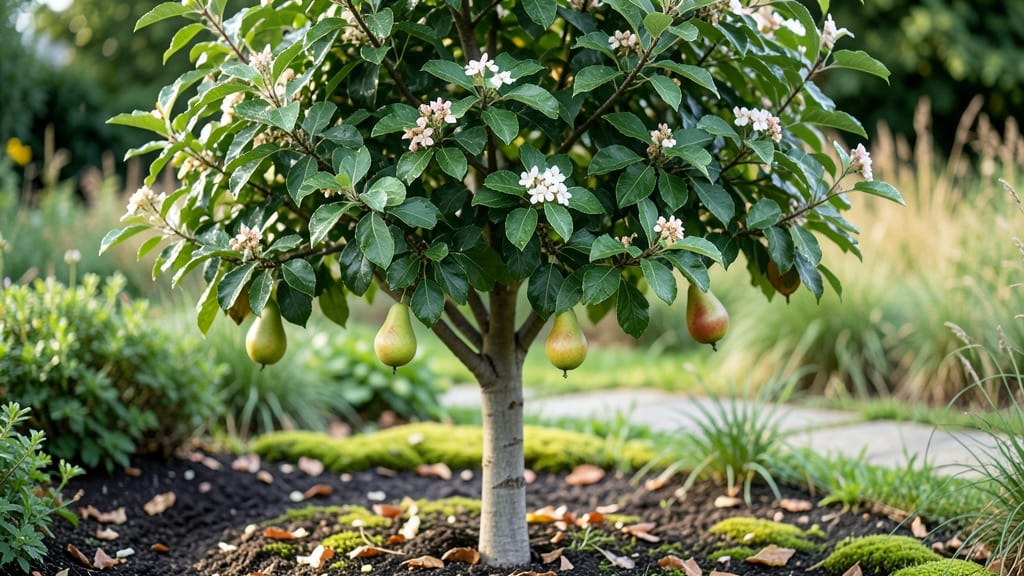
Oriental pear tree care rewards patience with stunning spring blooms and crisp summer fruit—but only if you prune like a pro. 🌸 I’ve watched mine go from scraggly to showstopper in just three seasons, and the secret isn’t complicated: it’s about timing, cuts, and knowing which branches to keep (and which to say goodbye to).
Start with the right tools: clean, sharp pruners and a sturdy ladder (or a sturdy friend). You’ll focus on three key cuts: removing dead wood, thinning crowded branches, and shaping the tree to let sunlight reach every fruit cluster.
The best time? Late winter, when the tree’s dormant but the buds are already dreaming of spring.
By summer, your tree will be bursting with blossoms and setting fruit like it’s auditioning for a garden center. The fruit? Juicy, sweet, and ready to pick in late August—if you’ve pruned correctly, that is. (Trust me, I’ve tasted the difference between a well-pruned tree and one that’s been neglected.)
This works for both young trees and mature specimens, though older trees need a gentler touch. The goal? A strong structure that produces fruit and flowers year after year. Let’s get those branches in shape!
📚 In This Guide
- What you need
- Instructions
- Tips and common mistakes
- Wrapping up and next steps
What you need
- ● Pruning shears: Bypass pruners (sharp, clean, and disinfected with rubbing alcohol). Size: 6-8 inches for small branches.
- ● Loppers: For thicker branches (up to 2 inches in diameter). Look for: Ratchet or bypass style for precision.
- ● Pruning saw: For branches over 2 inches thick. Type: Curved-tooth saw for clean cuts.
- ● Gloves: Heavy-duty, cut-resistant gloves to protect your hands from thorns and rough bark.
- ○ Disinfectant: 70% isopropyl alcohol or a commercial pruning sealant (optional but recommended to prevent disease spread).
- ● Twine or zip ties: For supporting branches if needed (e.g., after heavy pruning).
- ● Ladder or step stool: For reaching higher branches safely. Height: Extend at least 3 feet above the branch you’re pruning.
- ● Pruning paint/sealant: To cover large cuts (over ½ inch) and prevent disease entry.
- ● Extension pole: For high branches (attachable pruners or loppers).
- ● Work boots or closed-toe shoes: For stability on uneven ground.
- ● Notebook & pen: To sketch a quick pruning map or note branch locations.
- ● Bird netting: If your tree attracts pests like birds or squirrels (use after pruning season).
Step-by-Step pruning guide for Oriental pear trees
Here’s how to keep your tree thriving with vibrant blooms and sweet fruit—no guesswork involved.
✂️ Step 1: Prune in Late Winter Before Bud Break
Timing matters most for Oriental pears. Wait until late winter (just before buds swell) to prune—this ensures you remove dead wood while leaving healthy buds intact. I grab my bypass pruners and start by removing any dead, diseased, or crossing branches first. These are easy to spot: they’re brown, brittle, or growing inward toward the center of the tree.
Look for suckers (vigorous shoots at the base) and water sprouts (vertical shoots growing straight up). These compete with fruit-bearing branches for energy. Cut them back to a bud or lateral branch using a 45-degree angle—this helps water run off and prevents rot. I always sanitize my tools with rubbing alcohol between cuts to avoid spreading disease.
☀️ Step 2: Thin Out Crowded Branches for Better Airflow
Oriental pears need good airflow to prevent fungal diseases like fire blight. Focus on the interior of the tree and remove branches that are too close together (within 6-8 inches of another). Thin by cutting back to a healthy outward-facing bud—this opens up the canopy and lets sunlight reach all parts of the tree.
If a branch is too long, shorten it to a strong lateral branch or bud. Never leave a stub—this invites decay. I aim to keep the tree’s shape open and vase-like, with branches spreading evenly. This not only improves fruit production but also makes harvesting easier later.
🌿 Step 3: Shape the Tree for Optimal Fruit Production
Oriental pears produce fruit on both old and new wood, so you’ll want to encourage a balanced structure. Start by selecting 3-4 main scaffold branches (thick, sturdy limbs) that spread evenly around the tree. Remove any branches that grow too upright (they’ll break under fruit weight) or too low (they’ll be hard to harvest).
For young trees, I focus on light pruning—just enough to shape without stressing the plant. For mature trees, I prune more aggressively to renew growth. Cut back older branches by one-third to stimulate new, fruiting wood. Always make cuts just above an outward-facing bud—this ensures new growth heads in the right direction.
⏰ Step 4: Summer Pruning to Control Growth and Prevent Disease
After the initial winter pruning, summer is your second chance to shape the tree. In June or July, remove any suckers, water sprouts, or branches that grew too vigorously after spring. These compete with fruit production and make the tree look messy. I also thin out clusters of fruit to 6-8 pears per branch—this prevents overburdening and ensures larger, sweeter fruit.
Watch for dieback (sudden branch death) caused by fire blight—a common issue with pears. If you see blackened, oozing branches, cut 6 inches below the damage and sterilize your tools immediately. Summer pruning keeps the tree healthy and productive while reducing disease risk before winter.
🪴 Step 5: Clean Up and Prepare for Next Season
Once pruning is done, remove all debris from under the tree—this prevents pests and diseases from overwintering. I rake up fallen leaves and branches and compost them (or dispose of them if diseased). Then, I apply a layer of mulch (about 2-3 inches thick) around the base, keeping it 6 inches away from the trunk to avoid rot.
Finally, I inspect the tree for any remaining weak or diseased branches and make final adjustments. Oriental pears respond well to consistent care, so sticking to this routine year after year ensures beautiful blooms, abundant fruit, and a strong, healthy tree. Mark your calendar now—next year’s pruning starts in late winter again!
Tips & tricks for pruning Oriental pear trees
Here's what I've learned after years of pruning these beautiful fruit trees—small details make all the difference.
Timing is Everything: That late winter timing in Step 1 is non-negotiable. I've seen trees bloom poorly when pruned too early—buds need to stay intact. Check for swollen buds (they'll look like tiny green beads) to confirm you're ready. If your winter is unusually warm, wait until just before the first bloom appears. For colder climates, aim for February to early March when the tree is still dormant but before buds swell.
Tool Prep Prevents Problems: I can't stress enough how important it is to sanitize your tools between cuts, especially when dealing with diseased branches in Step 1. Use rubbing alcohol or a 10% bleach solution (mixed with water) on your pruners between each cut. I keep a small spray bottle handy for quick sanitizing. Sharp tools also matter—dull blades crush branches, making them more susceptible to disease. Test your pruners by cutting through a piece of paper cleanly before starting.
Shape Matters for Fruit Production: When shaping your tree in Step 3, think about sunlight exposure. The goal is to create an open center that lets light reach all branches. I like to visualize the tree as an open vase—branches should spread outward and upward. For mature trees, cutting back older branches by one-third stimulates new growth, but don't remove more than 25% of the tree's canopy in a single year. This gradual approach prevents shock while encouraging robust fruit production.
Summer Pruning Strategy: The June or July pruning in Step 4 is your chance to clean up any vigorous growth that appeared after spring. I focus on removing water sprouts (those vertical shoots) first—they're energy vampires that drain resources from fruit production. For fruit thinning, I use a simple rule: keep the largest, healthiest pears spaced 6-8 inches apart. This ensures each pear gets proper nutrients and sunlight, resulting in sweeter, larger fruit by harvest time.
Pro Tips for Oriental Pear Tree Care
- Here's what I've learned after years of pruning these beautiful fruit trees—small details make all the difference.
- Timing is Everything: That late winter timing in Step 1 is non-negotiable.
- Tool Prep Prevents Problems: I can't stress enough how important it is to sanitize your tools between cuts, especially when dealing with diseased branches in Step 1.
Frequently asked questions
When is the best time to prune an Oriental pear tree?
Prune your Oriental pear tree late winter or early spring (just before buds swell) for optimal results. This timing removes dead wood, opens the canopy for sunlight, and encourages vigorous spring growth. Avoid heavy pruning in fall—it can stimulate new growth that won’t harden off before winter.
How do I encourage more fruit production?
For bountiful harvests, focus on balanced pruning—remove competing branches, "water sprouts," and crossing limbs. Thin out clusters of fruit to 6–8 inches apart to reduce stress on the tree. Also, ensure it gets 6+ hours of sunlight daily and fertilize lightly in early spring with a balanced 10-10-10 formula.
What should I do if my tree’s branches are dying or blighted?
If you spot blackened, mushy branches (a sign of fire blight), prune infected wood 6–12 inches below the damage using sterilized tools. Dip cuts in a 1:10 bleach-water mix to prevent spread. Apply copper fungicide in early spring as a preventive measure—Oriental pears are prone to this fungal disease!
Can I grow an Oriental pear tree in a container?
Yes, but it’s challenging—these trees grow large (20–30 ft tall) and need deep roots. Choose a 15+ gallon pot with drainage holes and use well-draining soil. Prune aggressively to control size, and move the container to a sunny spot in winter if temps drop below 10°F. Dwarf varieties (like ‘Seigenthaler’) are better suited for containers.
Why aren’t my Oriental pear blooms turning into fruit?
Lack of fruit can stem from poor pollination, thinning errors, or environmental stress. Hand-pollinate with a small brush if bees are scarce, ensure you’re thinning fruit (not flowers), and check for pests like pear psylla. Also, young trees (<3 years old) may need 1–2 more years to mature before fruiting.
What’s the difference between pruning for blooms vs. fruit?
| For Blooms | For Fruit |
|---|---|
| Focus on airflow—remove dense growth to prevent fungal diseases that ruin buds. | Prioritize structural strength—support heavy branches with crotch unions. |
| Light pruning (<10% of canopy) to preserve flower-producing wood. | Moderate pruning (15–20%) to balance fruit load and tree health. |
| Prune after blooming to avoid cutting off next year’s flowers. | Prune before bud swell to shape for fruit-bearing branches. |
Pro tip: Oriental pears are self-pollinating, but cross-pollination with another variety (like ‘Kieffer’) can boost yields!
Wrapping up and next steps
Caring for your Oriental pear tree is all about patience, precision, and a little love—just like nurturing any prized garden gem! 🌸 With the right pruning techniques, you’ll unlock stunning blooms and bountiful fruit for years to come.
Remember: timing, tools, and technique are your best friends, and even small adjustments can make a big difference.
Ready to see your tree thrive? Roll up your sleeves and schedule your next pruning session—whether it’s shaping those branches or prepping for winter. Every cut is a step toward a healthier, more beautiful tree. You’ve got this! 🌱✨