
Pruning
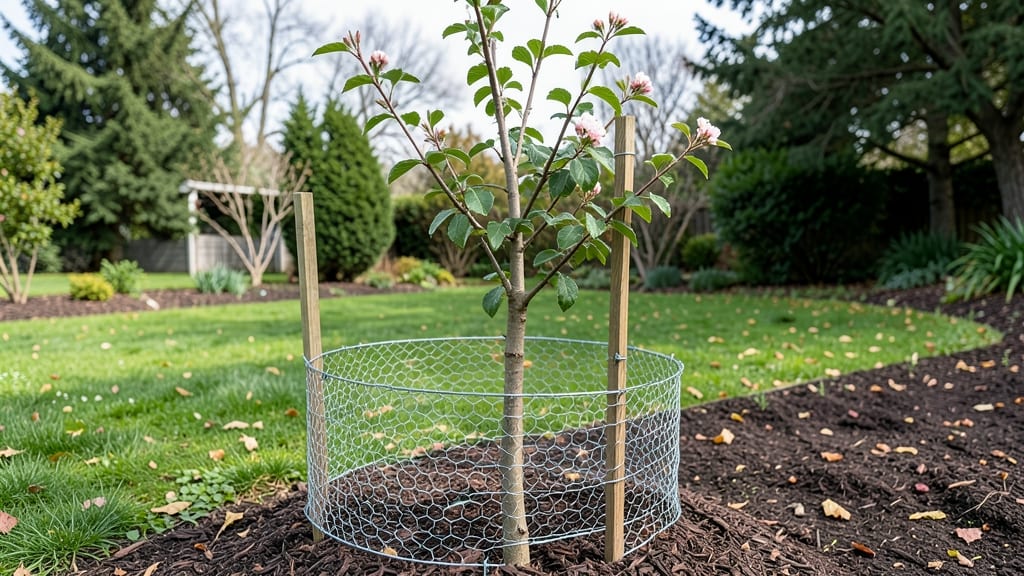
A mesh tree guard is your sapling's best defense against deer, rabbits, and hungry critters that turn young trunks into snack bars. 🌳 I learned this the hard way when my prized redbud sapling got stripped to the bark by a neighborhood buck—until I wrapped it in a sturdy guard.
The right material makes all the difference: plastic guards are lightweight and easy to install, while metal guards last years but require more effort. Choose based on your biggest threat—deer need heavy-duty guards, while voles can be stopped with thinner plastic.
Proper sizing is critical too; guards should extend from the base to at least 6 feet high for deer protection. You'll see immediate results: no more chewed bark, no new scars on the trunk, and a tree that grows strong and straight.
The guards also protect against sunburn and lawnmower damage, making them a multi-purpose shield for young trees. Works for almost any species—just avoid using them on trees with rough bark or those prone to disease, where ventilation is key. Here's how to get it right the first time!
📚 In This Guide
- What you need
- Instructions
- Tips and common mistakes
- Wrapping up and next steps
What you need
- ● Hardware cloth or mesh: 18-gauge galvanized steel or aluminum mesh (¼-inch or ½-inch openings) – enough to wrap around the sapling’s trunk and extend 1-2 feet above and below the soil line.
- ● Measuring tape: 1 for precise sizing.
- ● Scissors or tin snips: Heavy-duty pair to cut mesh cleanly.
- ● Staple gun + staples: 18-gauge staples (or zip ties as an alternative).
- ○ Plastic or metal flashing: 1-2 ft strip to reinforce the guard’s base (optional but recommended for extra durability).
- ● Work gloves: To protect hands while handling sharp edges.
- ● Pliers: For bending mesh or securing stubborn staples.
- ● Safety goggles: If cutting mesh aggressively.
- ● Marking tool: Pencil or chalk to outline cuts.
- ● Clear day for assembly: Avoid windy or wet conditions for best results!
- ● Reflective tape (to deter deer with a flash of light).
- ● Waterproof sealant (for extra protection in rainy climates).
- ● Pre-cut mesh panels (if you’re crafting multiple guards).
Step-by-Step instructions for installing a mesh tree guard
Here’s how I protect young trees from hungry critters and wandering deer—without sacrificing airflow or growth.
🪴 Step 1: Measure and Cut the Mesh Guard to Fit
Start by measuring your sapling’s trunk height—most guards should extend from the soil line to about 6 feet (or the height of the tree’s lowest branches). Use the scissors to cut the mesh guard 1-2 inches wider than the trunk’s circumference at the base. This ensures a snug fit without crushing the bark.
I like to overlap the edges slightly when wrapping, so I cut the guard about 3 inches longer than the actual circumference. If your tree is irregularly shaped, add an extra inch to prevent gaps where pests could sneak in. Mark the cut lines with a permanent marker before trimming for precision.
🌱 Step 2: Secure the Guard with Zip Ties
Slide the mesh guard around the trunk, positioning the soil line at the base—this prevents rodents from burrowing underneath. Use 4-6 zip ties spaced evenly along the length of the guard. Start at the bottom and work your way up, tightening each tie just enough to hold the mesh firmly against the bark.
Real talk: Don’t cinch the ties too tight—you want the guard to stay in place but allow the tree to grow. I test by gently squeezing the guard; if it resists, loosen the tie slightly. Leave a ½-inch gap at the top to allow for future growth without cutting the guard.
✂️ Step 3: Bury the Bottom Edge and Add Support Stakes
Dig a 1-inch-deep trench around the base of the guard with the garden trowel, then tuck the bottom edge into the soil. This blocks rabbits and voles from nibbling at the trunk. Pack the dirt lightly around the guard’s base to secure it.
Drive 2-3 stakes into the ground 6-12 inches from the trunk, angling them slightly outward. Attach the guard to the stakes with additional zip ties or soft twine to prevent wind from loosening it. This keeps the guard upright, especially for tall or flexible saplings.
💧 Step 4: Monitor and Adjust as the Tree Grows
Check the guard every 4-6 weeks—if the tree outgrows the mesh, carefully cut the zip ties and slide the guard upward, then re-secure it. I use a hacksaw for stubborn ties to avoid damaging the bark. If gaps appear, reinforce with extra zip ties or a patch of mesh.
Remove the guard once the trunk reaches 4-5 inches in diameter or when the tree’s bark is too thick for pests to damage. This usually happens after 2-3 years, depending on the species. Store the guard for future use—it’s reusable for years!
Tips & tricks for perfect tree guard installation
Installing a mesh tree guard can feel tricky at first, but these simple tricks will help you create a protective shield that lasts for years.
Precision Cutting: When cutting your mesh guard in Step 1, use a straightedge like a ruler or a piece of wood to guide your scissors. This ensures clean, straight edges that wrap neatly around the trunk. I mark my cut lines with a permanent marker first—it prevents mistakes when you're working with the mesh's natural stiffness. The extra inch for irregular shapes is worth it to keep pests out of crevices.
Zip Tie Strategy: For Step 2, I recommend using nylon zip ties instead of plastic—they’re more durable and won’t degrade in sunlight. Space them every 12-18 inches along the guard’s length, starting from the bottom. If you notice the guard shifting after a few weeks, add an extra tie at the midpoint. That half-inch gap at the top? It’s intentional—it gives the tree room to grow without tearing the mesh.
Stake Placement: In Step 3, position your stakes at a 45-degree angle outward from the trunk. This creates a natural tension that keeps the guard upright, even in windy conditions. For flexible saplings, drive the stakes closer to the trunk (6 inches)—they’ll need extra support. If you’re working with a very tall guard, consider adding a third stake on the opposite side for balance.
Long-Term Care: When monitoring your guard in Step 4, use a soft-bristle brush to gently clean debris from the mesh every few months. This prevents mold buildup and keeps the guard looking fresh. I also recommend labeling the guard with the tree species and planting date—it helps track growth progress over time. Most importantly, always use the hacksaw for stubborn zip ties; regular scissors can slip and damage the bark.
Pro Tips for Mesh Tree Guard
- Installing a mesh tree guard can feel tricky at first, but these simple tricks will help you create a protective shield that lasts for years.
- Precision Cutting: When cutting your mesh guard in Step 1, use a straightedge like a ruler or a piece of wood to guide your scissors.
- Zip Tie Strategy: For Step 2, I recommend using nylon zip ties instead of plastic—they’re more durable and won’t degrade in sunlight.
Frequently asked questions
Got questions about mesh tree guards?
You’re not alone! Here are answers to the most common concerns—from installation to long-term care—so you can protect your saplings with confidence.
What’s the best time of year to install a mesh tree guard?
Install guards as soon as you plant or prune your sapling—spring or early fall is ideal. This gives young trees immediate protection against pests like rabbits, deer, and rodents. Avoid winter installation, as frozen soil can make digging difficult, and summer heat may stress newly planted trees.
How tall should a mesh tree guard be to stop deer?
For deer, aim for 8–10 feet tall—their heads are ~4–5 feet off the ground, and taller guards deter them from rubbing against the trunk. Bury the guard 6–12 inches deep to prevent digging. Pro tip: Add a 12-inch wire collar at the base for extra reinforcement.
Can I reuse a mesh tree guard on multiple trees?
Yes! Clean and disinfect guards between uses with a 10% bleach solution to kill pests or diseases. Avoid reusing guards on the same tree if it’s been severely damaged (e.g., gnawed or diseased). Bonus: Mark guards with tree IDs to track growth and pest activity.
Will mesh tree guards work in heavy rain or snow?
Most high-quality mesh guards (like hardware cloth) resist weather, but check for staple holes or rust after storms. Secure guards with galvanized staples or zip ties to prevent wind damage. For snow-prone areas, use slotted guards to allow melting snow to drain.
What’s a good alternative if mesh guards fail?
If pests persist, try:
- Chemical repellents (like rotten-egg spray) for short-term fixes.
- Physical barriers: Wrap trunks with plastic tree tubes or burlap sacks (remove after 1–2 years to avoid girdling).
- Guardian plants: Plant thorny shrubs (e.g., roses) near saplings to deter deer.
Wrapping up and next steps
Protecting your young trees from hungry critters and wandering deer doesn’t have to be a guessing game!
With a mesh tree guard, you’ve got a simple, effective, and eco-friendly solution at your fingertips. 🌱 Whether you’re safeguarding a prized sapling or just starting your backyard forest, this small investment can save your greenery—and your sanity—from the chaos of nature’s nibblers.
Ready to take action? Grab your materials, follow the steps, and give your trees the armor they deserve! Your future forest starts with just one guard—so why wait? 🌳✨