
Container Gardens
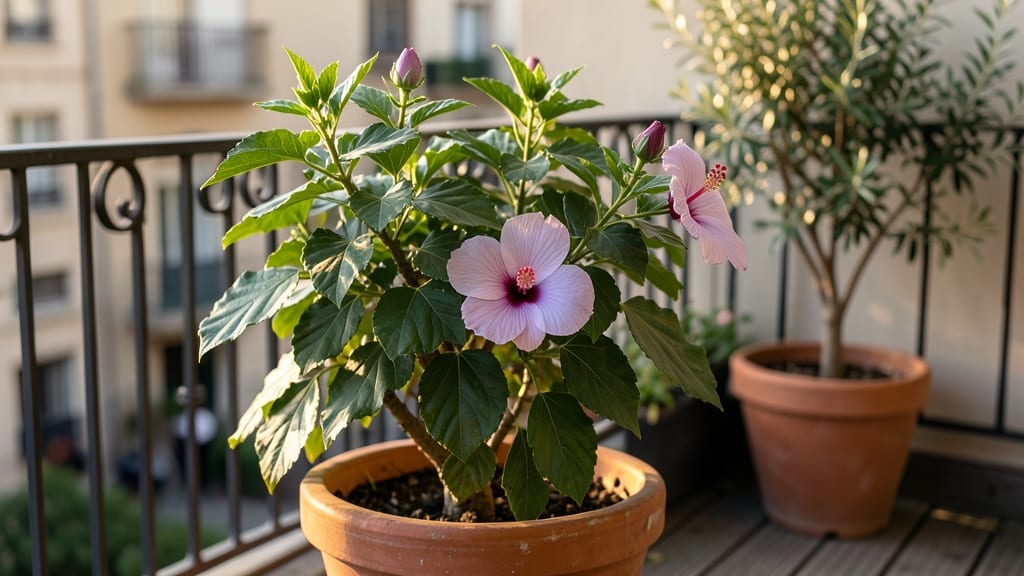
Growing a hibiscus tree in a container gives you vibrant blooms without taking over your yard—just a sunny spot and a few smart choices. 🌸 I’ve watched mine burst into color from spring through fall, proving that even small spaces can host these tropical showstoppers.
The key? Matching the right pot, soil, and care to a plant that loves warmth and consistent moisture.
Start with a 5-gallon container (minimum) for dwarf varieties or 15+ gallons for standard hibiscus—drainage holes are non-negotiable to prevent root rot. Use a well-draining potting mix with perlite or sand, and position your container where it gets 6+ hours of direct sun daily.
Overwatering is the #1 killer, so let the top inch dry between waterings, and fertilize monthly with a balanced liquid feed during growing season.
Pruning keeps your hibiscus lush and blooming. After the first frost, trim back leggy growth by ⅓ to encourage bushier spring growth, and deadhead spent flowers regularly.
Container hibiscus thrive in zones 9-11, but with winter protection (move indoors or wrap in burlap), you can extend their life for years. The payoff? A compact, fragrant centerpiece that turns heads—no yard required.
Watch for aphids or whitefly infestations (spray with neem oil if they appear) and repot every 2-3 years to refresh the soil. With the right setup, your hibiscus will reward you with 3-inch blooms in shades of red, pink, or yellow—proof that big beauty fits in small spaces.
Ready to grow yours?
📚 In This Guide
- What you need
- Instructions
- Tips and common mistakes
- Wrapping up and next steps
What you need
- ● Container: A large pot (at least 18-24 inches in diameter) with drainage holes. Opt for fiberglass, ceramic, or heavy plastic for stability.
- ● Potting Mix: A well-draining blend like cactus/succulent mix or a 50/50 mix of garden soil and perlite/pumice (avoid heavy clay soil).
- ● Hibiscus Plant: A dwarf or tropical hibiscus variety (e.g., Hibiscus rosa-sinensis) suited for containers. Check for healthy roots and vibrant foliage.
- ● Fertilizer: A balanced liquid fertilizer (10-10-10 or 20-20-20) or a slow-release granular fertilizer for hibiscus.
- ● Mulch: Organic mulch (bark or pine needles) to retain moisture and regulate soil temperature.
- ● Pruning Shears: Sharp, clean shears for trimming dead blooms or shaping the plant.
- ● Watering Can or Hose: With a gentle spray nozzle for even watering.
- ● Container Saucer: To catch excess water and prevent messes.
- ● Support Stake: For taller varieties to maintain structure.
- ● Soil Moisture Meter: To monitor hydration levels (especially in hot climates).
- ● Epsom Salt: Occasionally adds magnesium for vibrant blooms.
- ● Decorative Stones or Pebbles: For a polished, aesthetic touch around the base.
Step-by-step instructions for growing a hibiscus tree in a container
Here's how to cultivate a thriving, blooming hibiscus in a pot—no yard required.
🪴 Step 1: Select the Right Container and Drainage
Choose a container at least 18-24 inches wide and deep—hibiscus roots need room to spread and access moisture. I prefer unglazed terra cotta because it breathes and prevents root rot, but any pot with drainage holes works. If your pot lacks holes, drill 2-3 ½-inch holes near the bottom to prevent waterlogging.
Add a 2-inch layer of pebbles or broken pottery at the bottom before soil. This creates an air pocket that prevents soggy roots. Hibiscus hate sitting in wet feet, and this layer ensures excess water drains away while keeping roots anchored. Skip this step, and you risk fungal diseases that will stunt growth or worse.
🌱 Step 2: Prepare the Soil Mix for Optimal Growth
Use a blend of 60% high-quality potting mix, 20% perlite or pumice, and 20% compost. Hibiscus thrive in slightly acidic to neutral soil with excellent drainage—regular garden soil compacts and suffocates roots. I mix everything in a wheelbarrow until it looks fluffy and dark, like crumbled chocolate cake.
Fill the container to 2 inches below the rim, leaving space for watering. Tap the pot gently on the ground to settle the soil without compacting it. The goal is a loose, airy mix that lets roots breathe while holding moisture. Press down too hard, and you’ll restrict root expansion, which directly limits flower production.
☀️ Step 3: Plant and Position for Maximum Sunlight
Remove the hibiscus from its nursery pot and loosen the roots gently with your fingers. If roots are circling tightly, make 2-3 vertical cuts with clean scissors to encourage outward growth. Place the plant in the center of the container, ensuring the top of the root ball sits ½ inch below the soil line—this prevents stem rot from sitting water.
Backfill with your soil mix, pressing lightly around the edges to eliminate air pockets. Water deeply until it drains from the bottom holes, then place the pot in a location with full sun exposure (6+ hours daily). Hibiscus are sun-worshippers, and insufficient light leads to sparse blooms. South-facing patios or balconies work best, but if you’re in a shaded spot, supplement with a grow light for 14 hours daily.
💧 Step 4: Water and Fertilize for Continuous Blooms
Water when the top 2 inches of soil feel dry—stick your finger in to check. Hibiscus need consistent moisture but hate soggy roots. I water deeply in the morning, letting the excess drain completely. After watering, I always empty the saucer underneath to prevent root rot. Overwatering is the #1 killer of container hibiscus, so err on the side of slightly dry soil.
Feed every 2-4 weeks during spring and summer with a balanced liquid fertilizer (10-10-10) diluted to half-strength. Hibiscus are heavy feeders, but too much fertilizer burns roots. I switch to a low-phosphorus formula in fall to encourage root growth for winter. Stop fertilizing in late fall to let the plant rest—this ensures robust blooms next season.
✂️ Step 5: Prune and Maintain for Year-Round Health
Prune in early spring before new growth starts. Cut back leggy stems by ⅓ to encourage bushier growth and more flowers. I also remove any dead or crossing branches with clean, sharp pruners. Hibiscus bloom on new wood, so pruning stimulates fresh growth and prolongs the flowering season. Avoid heavy pruning in fall—it stresses the plant before winter.
Watch for pests like aphids or spider mites, which love hibiscus. I spray leaves with a neem oil solution at the first sign of trouble. Container hibiscus also need occasional repotting—every 2-3 years or when roots circle the pot. This refreshes the soil and gives roots more space to thrive. With proper care, your hibiscus will reward you with vibrant blooms from spring through fall.
Tips & tricks for perfect container hibiscus growth
Took me years of trial-and-error to master these key details—here's how to avoid the most common pitfalls with your potted hibiscus.
Container Selection: The 18-24 inch size requirement isn't arbitrary—hibiscus roots spread aggressively. If you're limited to smaller pots, choose a dwarf variety like 'Luna Red' which thrives in 12-15 inch containers. For standard varieties, upgrade to a 24-inch pot when you notice roots circling the edges after 2-3 years. The terra cotta preference isn't just about aesthetics—it wicks moisture away from roots, preventing the fungal issues that plague plastic containers.
Soil Mix Science: That 60-20-20 ratio (potting mix/perlite/compost) creates the perfect balance: the potting mix holds moisture while perlite prevents compaction. I've found adding 5% worm castings to the compost boosts microbial activity, which in turn improves nutrient uptake. When filling your container, press the soil mix just enough to eliminate air pockets—think "lightly packed snow" consistency. The 2 inches below the rim isn't just for watering space; it prevents soil splatter when you water deeply.
Light Positioning: The 6+ hours of direct sunlight is non-negotiable, but here's the secret: hibiscus actually prefer morning sun and afternoon shade in hot climates. If you notice leaves curling or yellowing, it's often a sign of too much midday sun. For indoor growers, position your hibiscus within 3 feet of a south-facing window—any farther and you'll need supplemental grow lights. The 14-hour grow light recommendation works best with full-spectrum LED bulbs; cheap white bulbs won't provide the blue light spectrum hibiscus need for flowering.
Watering Wisdom: Checking the top 2 inches of soil is smart, but I've developed a better system: water when the pot feels about 20% lighter than when it was last watered. This accounts for evaporation and gives you a more consistent moisture level. The morning watering routine prevents fungal spores from settling overnight. And here's a pro move: after watering, lift the pot and check the bottom—if it's still wet after 30 minutes, you're overwatering. This simple test has saved me from losing several hibiscus to root rot.
Pro Tips for Hibiscus Tree In Container
- Took me years of trial-and-error to master these key details—here's how to avoid the most common pitfalls with your potted hibiscus.
- Container Selection: The 18-24 inch size requirement isn't arbitrary—hibiscus roots spread aggressively.
- Soil Mix Science: That 60-20-20 ratio (potting mix/perlite/compost) creates the perfect balance: the potting mix holds moisture while perlite prevents compaction.
Frequently asked questions
Got questions about growing a hibiscus tree in a container? You’re not alone! Here are some of the most common queries—and their answers—to help you nurture your tropical beauty with confidence.
How cold can a container hibiscus tolerate before it gets damaged?
A hibiscus tree in a container is more vulnerable to cold than its in-ground counterparts. Most varieties, like Hibiscus rosa-sinensis, can handle brief dips to 35–40°F (2–4°C), but prolonged exposure below 32°F (0°C) risks frost damage. If temps drop further, move it indoors or cover it with frost cloth. In colder climates, overwintering in a greenhouse or garage is ideal.
What’s the best potting mix for a container hibiscus?
Hibiscus trees thrive in well-draining, slightly acidic soil (pH 6.0–6.5). A mix of 50% peat moss or coconut coir, 30% garden soil, and 20% perlite or sand works wonders. Avoid heavy clay mixes, which can suffocate roots. Add a handful of compost or worm castings for nutrients, and repot every 2–3 years to refresh the mix.
How often should I fertilize a potted hibiscus?
Feed your container hibiscus every 2–4 weeks during spring and summer with a balanced liquid fertilizer (10-10-10 or 20-20-20), diluted to half-strength. In fall, switch to a low-nitrogen, high-phosphorus fertilizer to encourage blooms. Skip fertilizing in winter when growth slows. Over-fertilizing can burn roots, so always water thoroughly before applying fertilizer.
Why are my hibiscus leaves yellowing, and how do I fix it?
Yellow leaves often signal overwatering, underwatering, or nutrient deficiencies. Check the soil—if it’s soggy, let it dry out slightly between waterings. If the soil is bone-dry, increase hydration. Yellowing with brown edges? Fluoride buildup from tap water may be the culprit—use filtered or rainwater instead. For a quick boost, flush the soil with water and apply a chelated iron supplement if leaves are pale.
Can I grow a hibiscus tree in a container indoors year-round?
Yes, but it requires bright, indirect light (6+ hours daily)—a south- or west-facing window is ideal. If natural light is lacking, supplement with grow lights. Indoor hibiscus may bloom less than outdoor plants, but with proper care, you can enjoy year-round color. Watch for pests like spider mites (common indoors) and mist leaves occasionally to maintain humidity.
What’s a good alternative if my hibiscus struggles in containers?
If your hibiscus needs more space or struggles with container life, consider these low-maintenance alternatives:
- Bougainvillea: Thrives in containers, drought-tolerant, and bursts with color.
- Plumeria: Compact varieties like ‘Hawaiian Snow’ do well in pots and love heat.
- Jasmine (Trachelospermum): Fragrant, hardy, and happy in containers with partial shade.
- Bird of Paradise (Strelitzia): Striking foliage and flowers; choose dwarf varieties for smaller pots.
Wrapping up and next steps
Growing a hibiscus tree in a container is a rewarding way to bring vibrant, tropical beauty to any space—whether you're a seasoned gardener or just starting out!
With the right pot, soil, and care, you’ll enjoy year-round blooms and lush foliage that brightens up patios, balconies, or even indoor spots. 🌺
Now that you’re armed with tips on pruning, sunlight, and troubleshooting, why not take the next step? Pick your favorite hibiscus variety, grab a container, and start your own mini tropical oasis today!