
Pruning
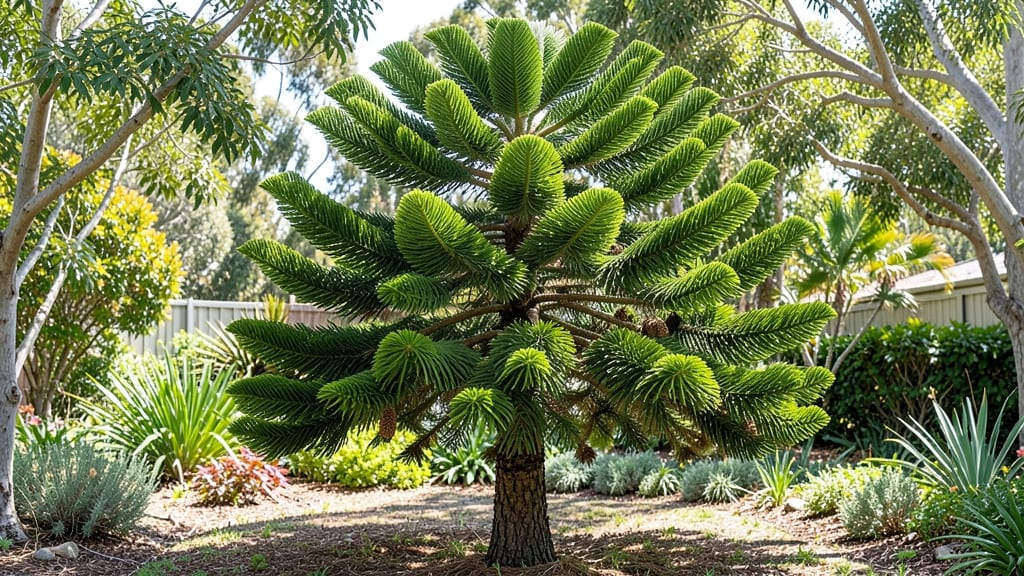
Transforming your patio into a winter wonderland starts with a Christmas tree in a flower pot—tiny but mighty, it steals the show without needing a yard. 🌲 I’ve styled these miniature trees for years, and the secret isn’t just the tree itself but how you pair it with lights, seasonal plants, and cozy textures to create a festive focal point that feels like a holiday hug in a pot.
You don’t need a full-grown tree—dwarf varieties like Fraser fir or Nordmann fir thrive in containers and stay manageable. Pair them with a sturdy pot (at least 12 inches wide), drainage holes, and a well-balanced soil mix to keep roots happy.
For extra charm, nestle in pinecones, eucalyptus sprigs, or even a mini wreath around the base.
The magic happens when you add twinkling string lights or battery-operated candles to cast a warm glow. Place your potted tree near a seating area, balcony railing, or even indoors by a window—it’ll become the heart of your holiday decor.
Maintenance is easy: water when the top inch of soil feels dry and prune lightly to keep the shape full.
Pro tip: Swap out seasonal accents every few weeks to keep the look fresh. Use this same setup year-round by replacing holiday decor with spring bulbs or summer annuals—your patio will be the envy of the neighborhood. Here’s how to make it happen!
📚 In This Guide
- What you need
- Instructions
- Tips and common mistakes
- Wrapping up and next steps
What you need
- ● Miniature Christmas tree: A pre-pruned or dwarf variety (e.g., Norfolk Island pine, Scots pine, or Fraser fir) in a 4–6 inch pot. Look for trees labeled as "miniature" or "dwarf" (height: 12–24 inches).
- ● Decorative flower pot: A 10–14 inch ceramic, terracotta, or fiberglass pot with drainage holes. Choose a style that fits your decor (e.g., rustic, modern, or whimsical).
- ● Potting soil: A well-draining mix (e.g., 50% peat moss, 30% perlite, 20% sand) or a pre-mixed cactus/succulent blend to prevent root rot.
- ● Pruning tools: Bypass pruners (for clean cuts on branches).
- ● Hand pruners (for smaller trimming tasks).
- ○ Sharp gardening shears (optional, for shaping).
- ● Holiday ornaments: Miniature baubles, fairy lights (battery-operated), or handmade decorations (e.g., pom-poms, ribbons).
- ● Tree topper: A star, angel, or bow (ensure it’s lightweight for small trees).
- ○ Mulch or moss: Cedar mulch or sphagnum moss (optional, for a natural woodland look).
- ● Watering can or spray bottle: For gentle hydration without disturbing the soil.
- ● A sunny or partially shaded spot (6+ hours of light daily for indoor trees; morning sun is ideal for outdoor pots).
- ● Basic pruning knowledge (or willingness to learn—watch a quick YouTube tutorial!).
- ● Patience for recovery: If pruning heavily, avoid decorating until new growth appears (2–4 weeks).
Step-by-step instructions for creating a Christmas tree in a flower pot
Transform your patio or balcony into a festive winter wonderland with this charming, space-saving holiday display.
🪴 Step 1: Choose the Right Container and Tree
Select a sturdy, decorative pot with drainage holes—12-18 inches wide works perfectly for a mini tree. I like glazed ceramic or metal containers because they add holiday charm while protecting roots. For the tree, opt for a pre-balled and burlapped dwarf conifer (like a Norway spruce or Blue Star) from a nursery. These stay compact and hold their shape beautifully.
Check the root ball size—it should fit snugly in your pot without overcrowding. If the tree comes with soil, gently loosen the edges to encourage root spread. This is the foundation, so take your time here. A tree that’s too big for the pot will struggle to stay upright and healthy.
🌱 Step 2: Prepare the Soil and Plant the Tree
Fill the pot halfway with a mix of 60% potting soil and 40% perlite or orchid bark for drainage. The goal is lightweight, airy soil that won’t suffocate roots. I like to add a slow-release fertilizer pellet to the bottom layer—this gives the tree nutrients without overwhelming it. Tap the pot gently to settle the mix.
Remove the tree from its container and place it in the pot, centering it so it sits straight. Fill the remaining space with soil, pressing lightly around the edges to eliminate air pockets. Leave a 1-inch gap between the soil and pot rim—this prevents overflow when watering. Water thoroughly until it drains from the bottom, then let it sit for 10 minutes to settle.
☀️ Step 3: Position for Light and Stability
Place your potted tree in a spot with 4-6 hours of indirect sunlight daily. Direct sun can dry out the soil and scorch delicate needles, while too little light causes the tree to stretch and lose its compact shape. A north or east-facing balcony works well, or move it under a grow light if indoors. Rotate the pot a quarter turn weekly so the tree grows evenly—you’ll notice one side leaning toward the light if you skip this.
Stability is key for a potted tree. Bury a 6-inch metal rod or stake near the base and loosely tie the trunk to it with soft twine. This prevents wind from tipping it over, especially if you decorate it with ornaments later. I also like to place a small saucer under the pot to catch water and add to the festive look.
💧 Step 4: Water and Maintain Through the Season
Water when the top inch of soil feels dry, which usually means every 5-7 days in winter. Overwatering is the biggest mistake—potted trees rot quickly in soggy soil. Use room-temperature water and avoid wetting the needles to prevent fungal issues. In cold climates, bring the pot indoors overnight if temperatures drop below 20°F to protect the roots.
Fertilize lightly once a month with a balanced, water-soluble fertilizer diluted to half strength. This keeps the tree vibrant without encouraging rapid growth, which can weaken its structure. Watch for brown needles—they’re a sign of stress, often from underwatering or drafts. Trim any damaged branches with clean pruners to keep the tree looking its best.
✂️ Step 5: Decorate and Enjoy Your Mini Holiday Tree
Once the tree is established (after 2-3 weeks
Display your tree for 4-6 weeks during the holiday season, then store it in a cool, dark place until next year. If you love it, replant it in the ground after the last frost—many dwarf conifers thrive outdoors year-round. The key is to enjoy the process; your patio will be the talk of the neighborhood!
Tips & tricks for perfect miniature holiday trees in flower pots
These simple tricks will help you create a stunning, stress-free holiday display that stays beautiful all season long.
Container Selection: Look for pots with sturdy handles or built-in saucers—they make moving and watering easier, especially when the tree is decorated. I also recommend choosing a pot that’s slightly wider than the tree’s root ball (about 2-3 inches extra) to allow room for root growth without sacrificing stability. The 12-18 inch range gives you plenty of options, from classic ceramic to rustic metal styles that complement holiday decor.
Soil Mix Matters: The 60% potting soil to 40% perlite or orchid bark ratio is perfect for drainage, but don’t skip the slow-release fertilizer pellet. This tiny addition makes a huge difference in keeping your tree healthy through the holidays. If you’re worried about over-fertilizing, remember that slow-release means exactly what it says—nutrients will be available gradually over weeks, not all at once. Tap the pot gently after filling to eliminate air pockets that could prevent proper water drainage.
Lighting Strategy: The 4-6 hours of indirect sunlight is ideal, but if your space gets less light, supplement with a grow light for 6-8 hours daily. Place the light about 12 inches above the tree to mimic natural sunlight. For even growth, rotate the pot a quarter turn weekly—this simple habit prevents the tree from leaning toward the light source, keeping it perfectly symmetrical for your holiday photos.
Decorating Secrets: Once your tree is established after 2-3 weeks, choose decorations that are no more than 1-2 inches in diameter to maintain the miniature scale. For extra sparkle, use battery-operated fairy lights instead of candles—they’re safer and create a magical glow without fire hazards. When adding faux snow spray, hold the can 8-10 inches away and use light, even strokes to avoid clumping on the needles.
Pro Tips for Christmas Tree In Flower Pot
- These simple tricks will help you create a stunning, stress-free holiday display that stays beautiful all season long.
- Container Selection: Look for pots with sturdy handles or built-in saucers—they make moving and watering easier, especially when the tree is decorated.
- Soil Mix Matters: The 60% potting soil to 40% perlite or orchid bark ratio is perfect for drainage, but don’t skip the slow-release fertilizer pellet.
Frequently asked questions
Got questions about creating or caring for a Christmas tree in a flower pot? You’re not alone! Here are some of the most common queries—plus straightforward answers to help you master this festive trend.
Can I use any Christmas tree variety in a pot?
Not all trees thrive in containers! Opt for dwarf varieties like Norfolk Island pine, miniature Fraser firs, or balsam firs (under 6 feet tall). Avoid full-sized trees—they’ll struggle with root space and water retention. Check the tag for "container-friendly" labels!
How long does it take for a potted Christmas tree to grow?
Patience is key! Dwarf trees grow 1–3 inches per year, so a 3-foot tree may take 3–5 years to reach maturity. For instant holiday cheer, buy a pre-grown potted tree (1–4 feet) from nurseries. Pro tip: Prune in early spring to encourage bushier growth!
What’s the best way to water a potted Christmas tree?
Overwatering is the #1 killer—let the top 1–2 inches of soil dry out between waterings. Use a pot with drainage holes and water deeply until it flows from the bottom. Mulch the soil to retain moisture, but avoid soggy roots. In winter, reduce watering if indoors (trees use less).
Can I reuse a potted Christmas tree year after year?
With proper care, your tree can live for decades. After the holidays, trim dried branches, move it to partial shade, and fertilize lightly in spring. Warning: If needles turn brown, it may need more sunlight or less water. Repot every 2–3 years to refresh the soil.
What if my potted tree loses needles?
Needle drop is normal (especially in dry indoor air), but excessive loss signals stress. Check for:
- Underwatering (soil feels bone-dry)
- Overwatering (mushy roots or yellowing needles)
- Low humidity (mist leaves or use a pebble tray)
- Pest damage (inspect for spider mites or aphids)
Wrapping up and next steps
Transforming your patio or balcony into a festive haven with a mini Christmas tree in a flower pot is easier—and more rewarding—than you think! 🌲 With the right pruning techniques, you’ll enjoy a lush, holiday-ready tree year after year.
Whether you’re a pruning pro or a beginner, this guide gives you the confidence to shape, care for, and celebrate with your tiny tree.
Now that you’re armed with tips and tricks, why not take the next step? Grab your shears, pick a sunny spot, and start pruning today. Your future miniature holiday masterpiece is waiting—happy decorating! ❄️