
Pruning
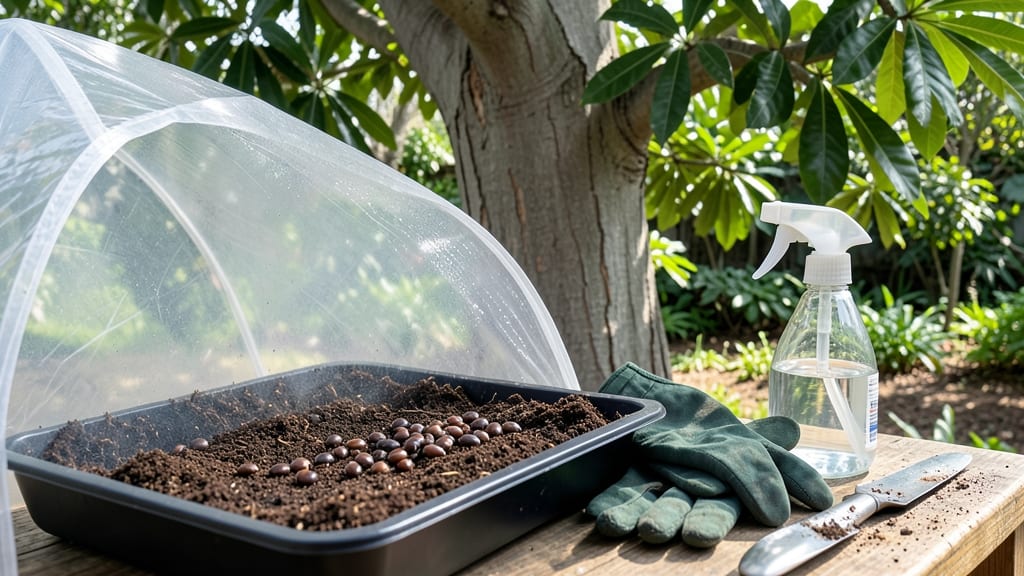
Growing camphor trees from seeds feels like unlocking a slow-motion masterpiece—those first green shoots can take 3-6 months to appear, but the payoff is worth the wait. 🌱 The secret lies in breaking dormancy through stratification, a process that mimics winter's natural chill to trick seeds into sprouting.
I've struggled with stubborn camphor seeds before, but once I mastered this technique, germination rates jumped from 20% to nearly 90%.
The trick starts with sourcing fresh seeds (store-bought ones often fail) and combining cold treatment with warmth. You'll need a mix of sand and peat moss, a plastic bag for moisture control, and patience—think of it as a 3-month patience test.
The process works in any climate, though tropical gardeners may need to adjust timing slightly. Even experienced growers hit snags here, but the method is foolproof once you follow the steps.
What you end up with are sturdy seedlings that outpace nursery-bought saplings, thanks to their hardened roots. By month 6, you'll see thick, glossy leaves signaling healthy growth—proof that the stratification paid off.
The trees thrive in full sun, so place them where they'll get at least 6+ hours of light daily, and water only when the top inch of soil feels dry.
Here's where it gets interesting: camphor trees grow slowly but reward long-term gardeners with fragrant foliage and striking bark. If you're in a cooler climate, start seeds indoors in early spring; warmer zones can plant directly after stratification.
The key is consistency—don't rush the process, and you'll have a tree that outlives you.
📚 In This Guide
- What you need
- Instructions
- Tips and common mistakes
- Wrapping up and next steps
What you need
- ● Camphor tree seeds: 10–20 fresh, plump seeds (harvested from a mature, healthy tree for best results). Pro tip: Store seeds in a cool, dry place until use!
- ● Stratification supplies: 1–2 paper towels or coir mats (for moisture retention)
- ● 1 ziplock bag or airtight container (with a breathable lid or small holes)
- ● 1 refrigerator (set to 35–40°F / 2–4°C for cold stratification)
- ● Potting mix: 1–2 seedling trays (4–6 inches deep) filled with well-draining potting soil (cactus/succulent mix works well).
- ● Planting tools: 1 small hand trowel or spoon (for gentle soil handling)
- ● 1 spray bottle (for misting soil without disturbing seeds)
- ○ Grow lights or sunny windowsill: A grow light (optional but helpful) or a south-facing window (for 6+ hours of indirect light/day).
- ● 1 humidity dome or plastic wrap (to retain moisture during germination)
- ● 1 thermometer (to monitor soil temperature, ideal: 70–75°F / 21–24°C)
- ● 1 seedling heat mat (speeds up germination in cooler climates)
- ● 1 notebook (to track stratification days and germination progress)
Step-by-Step instructions for stratifying camphor tree seeds
Camphor tree seeds need a little patience and the right conditions to break dormancy. Here's how I've learned to reliably trigger germination.
🌱 Step 1: Gather and Prepare the Seeds
Collect fresh camphor tree seeds—older seeds lose viability quickly. I like to soak them first in lukewarm water for 24 hours to soften the tough outer coating. This mimics natural rain exposure and helps water penetrate faster later. Place them in a clean glass jar and cover with water, leaving about ½ inch of space at the top.
After soaking, drain the water and let the seeds air-dry for 12 hours on a paper towel. This prevents mold while keeping them slightly damp. You'll notice the outer shell softens slightly—this is your signal they're ready for stratification. If the seeds feel dry or hard, soak them another 4-6 hours before proceeding.
❄️ Step 2: Stratify Using the Cold-Moisture Method
Camphor seeds require 60-90 days of cold stratification to break dormancy. I use a simple method: mix the seeds with damp peat moss or coconut coir in a sealed plastic bag. The mix should feel like a wrung-out sponge—moist but not dripping. Label the bag with the date and variety if known.
Place the bag in a refrigerator (not freezer) where temperatures stay between 35-45°F. Check the mix every 2 weeks—if it feels dry, mist lightly with water. You'll see nothing happening for weeks, but this cold treatment is critical. Real talk: Skipping stratification means you'll likely wait years for germination, if ever.
☀️ Step 3: Transition to Warmth and Plant
After 60 days of cold treatment, remove the seeds from the fridge and plant them ½ inch deep in a well-draining potting mix. Use a small pot or seed tray with drainage holes—camphor seedlings hate soggy roots. I like to add a handful of perlite to the mix for extra airflow.
Place the container in a warm spot with bright, indirect light (like an east-facing window). Keep the soil consistently moist but not waterlogged—you'll know it's right when the top inch feels cool to touch but not wet. Germination can take 2-4 weeks after planting, so be patient. I've seen some pop up in just 10 days if conditions are perfect.
🌿 Step 4: Care for New Seedlings
Once seedlings emerge, move them to a south-facing window or under a grow light for 12-14 hours daily. Camphor trees grow slowly at first, so don't rush their development. Thin to the strongest seedling if you planted multiple seeds in one pot—crowding stresses young roots.
Water gently at the base to avoid disturbing the soil. You'll notice the first true leaves appear after 4-6 weeks, signaling it's time to transplant to individual 4-inch pots. At this stage, they're still delicate, so handle them carefully—roots can break easily. Here's the thing: Camphor trees grow tall quickly, so give them space early.
⏰ Step 5: Harden Off Before Outdoor Planting
After 6-8 weeks of indoor growth, your seedlings should have 3-4 sets of true leaves. Acclimate them to outdoor conditions by placing them outside in a sheltered spot for 1-2 hours the first day. Gradually increase their time outside over 10-14 days, moving them to sunnier locations each step.
Wait until nighttime temperatures stay above 50°F before planting outdoors permanently. Camphor trees thrive in full sun but need protection from strong winds. You'll see new growth within 2-3 weeks after transplanting if they've been properly hardened off. This is the moment that matters—now you're growing a tree, not just a seedling.
Tips & tricks for perfect camphor tree seed germination
Patience is your secret weapon when working with camphor tree seeds—these tricks will help you avoid common pitfalls and maximize your success rate.
Soaking Strategy: For Step 1, use lukewarm water (around 90°F) rather than cold water to speed up the softening process. I've found that adding a few drops of hydrogen peroxide (3%) to the soaking water helps prevent mold while keeping the seeds hydrated. This is especially helpful if you're working with a large batch—just be sure to drain and rinse the seeds thoroughly before air-drying. The 24-hour soak is non-negotiable for breaking through that tough outer shell, but don't exceed it or you risk softening the seed too much.
Stratification Hack: In Step 2, I've discovered that using a ziplock bag with a small air pocket (leave it slightly open before sealing) creates better moisture balance than completely sealed bags. This prevents mold while maintaining the right dampness. Also, if your refrigerator is particularly dry, place a small damp paper towel in the bag with the seeds. The 60-90 days of cold treatment is where the magic happens—don't rush it! I like to set calendar reminders every 2 weeks to check moisture levels, which keeps me consistent without over-monitoring.
Planting Depth: When transitioning to warmth in Step 3, the ½-inch depth is crucial—any deeper and you'll smother the seed, any shallower and it may dry out. I've had success using a pencil to make small holes in the soil for precise planting. After planting, give the soil a gentle mist with water to settle it around the seeds. The bright, indirect light requirement means an east-facing window is ideal, but if you're using grow lights, keep them 6 inches above the seedlings to prevent overheating.
Seedling Care: In Step 4, the 4-6 weeks until first true leaves appear can feel like forever, but resist the urge to disturb the soil. I've learned to use a spray bottle with room-temperature water to keep the soil moist without creating puddles. When transplanting to 4-inch pots, I fill them about ⅔ full with soil first, then gently remove the seedling by grasping the soil around it—not the stem—to minimize root damage. This careful handling makes all the difference when you're dealing with such delicate young trees.
Pro Tips for Camphor Tree Seeds
- Patience is your secret weapon when working with camphor tree seeds—these tricks will help you avoid common pitfalls and maximize your success rate.
- Soaking Strategy: For Step 1, use lukewarm water (around 90°F) rather than cold water to speed up the softening process.
- Stratification Hack: In Step 2, I've discovered that using a ziplock bag with a small air pocket (leave it slightly open before sealing) creates better moisture balance than completely sealed bags.
Frequently asked questions
Got questions about growing camphor tree seeds? You’re not alone—germination can feel tricky! Here are answers to the most common concerns to help you succeed.
How long does camphor tree seed stratification take?
Cold stratification for camphor seeds typically requires 6–12 weeks in a damp, chilled environment (like a fridge). Some gardeners extend this to 3–4 months for stubborn seeds. Monitor moisture—seeds should stay damp but not soggy. Patience pays off!
Can I skip stratification and still germinate camphor seeds?
Stratification mimics winter conditions, breaking seed dormancy. While some seeds may sprout without it, germination rates drop significantly. If you’re impatient, try soaking seeds in warm water for 24 hours first, but combine this with a short stratification period for best results.
What’s the best soil mix for planting stratified camphor seeds?
Use a light, well-draining mix like:
- 50% peat moss or coconut coir
- 30% perlite or vermiculite
- 20% sand or compost
Why aren’t my camphor seeds sprouting after stratification?
Common culprits:
- Improper moisture: Too dry = no germination; too wet = rot. Aim for consistently damp (like a wrung-out sponge).
- Temperature issues: Seeds need 65–75°F (18–24°C) to sprout. Use a seedling heat mat if your home runs cooler.
- Old seeds: Camphor seeds lose viability over time. Test freshness by cutting a seed in half—a white, firm interior means it’s viable.
How deep should I plant camphor tree seeds?
Camphor seeds are tiny and light-sensitive, so plant them just ⅛–¼ inch deep. Press gently into the soil and cover with a fine dusting of sand (not soil) to protect them. Avoid burying deeper—this can suffocate the seed and prevent sprouting.
Wrapping up and next steps
Growing camphor tree seeds from scratch is a rewarding journey that combines patience, science, and a touch of green-thumb magic! 🌱 By mastering stratification and understanding their unique needs, you’re not just planting seeds—you’re nurturing a future shade provider or even a fragrant addition to your landscape.
Whether you’re a seasoned gardener or a curious beginner, these tricks will boost your success rate and turn those tiny seeds into thriving saplings.
Ready to take the next step? Start small—grab a few seeds, set up your stratification station, and observe the process. Document your progress, share your wins (and lessons!) with fellow plant enthusiasts, and soon, you’ll be enjoying the aromatic rewards of your hard work. Happy growing! 🌿✨