
Planting
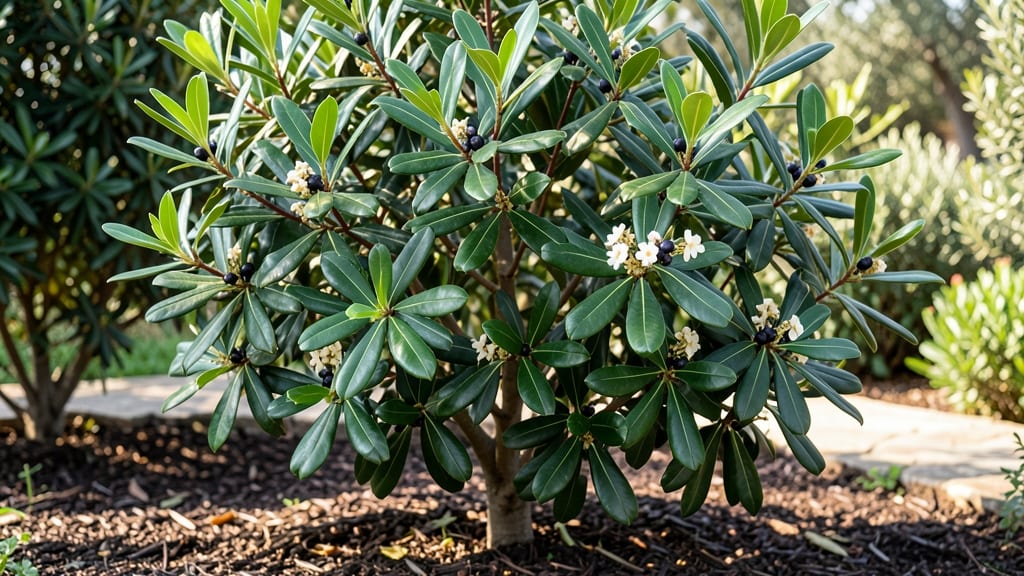
Planting a bay tree means year-round greenery that thrives even when winter bites. 🌿 I learned the hard way that not all bay trees survive cold snaps—until I found the cold-hardy varieties that stay lush through frost.
These evergreens bring that classic Mediterranean fragrance to your garden or patio, no matter the season. The secret lies in choosing the right variety and giving it the perfect spot: partial shade in hot climates, full sun in cooler areas, and well-draining soil that mimics its natural habitat.
Watering needs are simple—keep the soil moist but never soggy, and you’ll see new growth within weeks. By summer, your bay tree will reward you with glossy leaves and that unmistakable aroma, while its sturdy branches create a natural privacy screen.
Even in winter, it stays green and fragrant, making it the ultimate low-maintenance evergreen. For those in colder zones, mulching in fall and choosing dwarf varieties keeps it manageable. Whether you plant it in the ground or a large container, this tree delivers beauty and utility all year long.
📚 In This Guide
- What you need
- Instructions
- Tips and common mistakes
- Wrapping up and next steps
What you need
- ● Bay Tree Plant: 1–3 Laurus nobilis (Sweet Bay) or cold-hardy varieties like Laurus azorica (Azores Bay). Choose between: Nursery-grown saplings (3–5 gallons, 18–24" tall for best survival)
- ● Seeds (if propagating from scratch—germination takes 30+ days)
- ● Hardwood cuttings (6–8" long, ½" thick, taken in late winter)
- ● Soil: 1–2 cubic yards of well-draining, slightly acidic soil (pH 6.0–7.0). Mix with: 50% native soil
- ● 30% compost
- ● 20% perlite or coarse sand
- ● Fertilizer: 5 lbs of balanced organic fertilizer (10-10-10 or 5-5-5 ratio)
- ● Mulch: 2–3 inches of wood chips or pine straw (to insulate roots)
- ● Hand trowel (for transplanting seedlings)
- ● Garden shovel (for digging holes)
- ● Pruning shears (sterilized, for shaping or cuttings)
- ● Watering can or hose (with adjustable nozzle)
- ● Garden gloves (to protect hands from thorns)
- ● Measuring tape (to ensure proper spacing)
- ○ Optional: Rooting hormone (for cuttings)
- ● Plant support stake (if growing in windy areas)
- ● Frost cloth (for young plants in Zone 7 and colder)
- ● Location: Full sun to partial shade (6+ hours of sunlight daily). Sheltered from harsh winds.
- ● Climate Zone: USDA Zones 7–10 (cold-hardy varieties tolerate down to 10°F with mulch).
- ● Timing: Spring planting: After last frost (March–May)
- ● Fall planting: 6–8 weeks before first frost (September–October)
- ● Water Access: Consistent moisture (1–1.5 inches per week, more in drought)
Step-by-Step instructions for planting cold-hardy bay trees
Here’s how to plant these resilient evergreens for lush, year-round greenery that thrives even in cooler climates.
🌱 Step 1: Choose the Right Location and Prepare the Soil
Bay trees need full sun to partial shade—at least 6 hours of sunlight daily—but cold-hardy varieties tolerate some shade in hotter regions. I always pick a spot with well-draining soil because soggy roots will rot even the hardiest bay. If your soil is heavy clay, amend it with 3-4 inches of compost mixed into the top 12 inches of soil.
Test the pH before planting—bay trees prefer slightly acidic to neutral soil, ideally between 6.0 and 7.5. If your soil is too alkaline, add sulfur or peat moss to lower the pH gradually. Dig a hole twice as wide as the root ball but only as deep—planting too deep suffocates the roots and causes stress.
🪴 Step 2: Plant the Bay Tree Correctly for Stability
Remove the tree from its container and loosen any circling roots gently with your fingers—this encourages outward growth instead of root binding. Place the root ball in the hole so the top sits 1 inch above ground level; settling soil will lower it slightly over time. Fill the hole with native soil, pressing lightly to remove air pockets but not compacting too firmly.
Water deeply right after planting to settle the soil and eliminate air gaps. You’ll know it’s right when water drains freely from the bottom of the hole—no puddling. Mulch around the base with 2-3 inches of organic mulch, keeping it 6 inches away from the trunk to prevent rot. This retains moisture and regulates soil temperature.
☀️ Step 3: Water and Protect While Establishing Roots
Keep the soil consistently moist but not soggy for the first 4-6 weeks—this is critical for root establishment. Water deeply 2-3 times per week unless rainfall provides 1 inch of water. Overwatering now leads to root rot, while underwatering stresses the tree before it’s settled in. Check moisture by sticking your finger 2 inches into the soil; if it’s dry, water again.
Protect young trees from harsh winds and late frosts with burlap wraps or frost cloth in early spring. Cold-hardy bay trees handle 10-15°F once established, but tender new growth can still suffer damage. I always monitor weather forecasts and cover plants if frost is predicted within the first growing season.
✂️ Step 4: Prune and Maintain for Long-Term Health
Prune in late winter or early spring before new growth begins. Remove dead, diseased, or crossing branches first, then shape the tree to encourage an open canopy. Cut just outside the branch collar—the swollen area where the branch meets the trunk—to prevent damage. Never leave stubs; this invites infections and weakens the tree.
Fertilize lightly in early spring with a balanced, slow-release fertilizer (10-10-10 ratio). Over-fertilizing causes rapid, weak growth that’s prone to pests. Cold-hardy bay trees are low-maintenance once established, but I still check for spider mites or scale insects in hot, dry summers—spray with neem oil if you spot any.
⏰ Step 5: Monitor and Enjoy Year-Round Greenery
After the first year, your bay tree should need minimal care—just deep watering during droughts and occasional pruning to maintain shape. Cold-hardy varieties like ‘Winter Gem’ or ‘Tif’ stay green even in sub-zero temperatures, making them perfect for hedges, specimen plants, or culinary gardens. Harvest leaves anytime for cooking, but avoid heavy pruning in late summer to encourage new growth before winter.
Watch for signs of stress: yellowing leaves often mean overwatering, while brown edges signal underwatering or low humidity. If leaves drop suddenly, check for pests or sudden temperature swings. With proper care, your bay tree will reward you with decades of lush, fragrant foliage—and maybe even a few bay leaves for your kitchen!
Tips & tricks for perfect bay tree planting
Took me a while to figure these out, so here goes—your cold-hardy bay tree will thank you for these little details.
Location and Soil Secrets: That 6 hours of sunlight requirement in Step 1 is non-negotiable for healthy growth, but here's what nobody tells you: if your yard gets intense afternoon sun, plant on the north or east side of structures to break up the heat. Also, when amending clay soil with 3-4 inches of compost, mix in a handful of perlite—it improves drainage without changing the soil structure dramatically.
Root Care That Makes All the Difference: In Step 2, when loosening circling roots, don't just pull—they're delicate! Use your fingers to gently separate them, almost like untangling yarn. And that 1 inch above ground level placement? I've seen too many people plant too deep—just remember, the root flare (where roots meet trunk) should be visible after settling. This prevents suffocation and encourages strong root growth.
Watering Wisdom: The 2-3 times per week guideline in Step 3 is perfect, but here's the trick: water in the morning so leaves have time to dry before evening. This prevents fungal issues. And that 2 inches deep moisture check? Use a wooden skewer instead of your finger—it's more hygienic and gives you a better sense of moisture levels throughout the soil profile.
Protecting Young Growth: Those 10-15°F cold tolerance numbers in Step 3 are for established trees—new growth is much more delicate. I've learned the hard way that even cold-hardy varieties need protection during their first winter. Use frost cloth instead of burlap wraps (it's more breathable) and secure it loosely—too tight and you'll restrict growth. Also, monitor for 10°F or lower temps, which can still damage tender new shoots.
Pro Tips for Bay Tree Plant
- Took me a while to figure these out, so here goes—your cold-hardy bay tree will thank you for these little details.
- Also, when amending clay soil with 3-4 inches of compost, mix in a handful of perlite—it improves drainage without changing the soil structure dramatically.
- Root Care That Makes All the Difference: In Step 2, when loosening circling roots, don't just pull—they're delicate!
Frequently asked questions
Got questions about growing cold-hardy bay trees? Here are some of the most common ones—and their answers—to help you keep your bay tree thriving all year round!
Can bay trees survive winter in cold climates?
Most Laurus nobilis (sweet bay) varieties struggle below 15°F (-9°C), but cold-hardy types like Laurus × cypriani or Umbellularia californica (California bay) can handle 5°F (-15°C) with proper mulching and winter protection. Choose native or hybrid varieties for your zone!
How long does it take for a bay tree to grow to harvest size?
Bay trees grow slowly—expect 3–5 years for a small tree (6–10 ft) and 5–10 years for a mature, harvest-ready specimen (15–20 ft). Patience pays off, though! Prune lightly in early spring to encourage bushier growth and faster leaf production.
What’s the easiest way to propagate a bay tree?
Use softwood cuttings in late spring or early summer for the best success. Take 4–6 inch tips, strip lower leaves, dip in rooting hormone, and plant in moist perlite or sand. Keep humidity high (cover with a plastic bag) and roots should form in 8–12 weeks. Avoid overwatering!
Why are my bay tree leaves turning yellow or brown?
Yellow leaves often signal overwatering or poor drainage, while brown edges can mean underwatering or salt buildup from tap water. Check soil moisture (top 2 inches should dry out) and ensure pots have drainage holes. Spider mites or scale insects can also cause browning—spray with neem oil if pests are present.
Can I grow a bay tree in a container, or does it need to be planted in the ground?
Bay trees thrive in large containers (15+ gallons) with well-draining soil. Use a mix of potting soil and perlite, and move pots indoors (near a sunny window) if temps drop below 20°F (-7°C). Just remember: container-grown trees need more frequent watering and may grow slower than in-ground plants.
Wrapping up and next steps
Growing a bay tree plant in your garden is a fantastic way to add year-round greenery and even harvest fragrant leaves for cooking! Whether you’re drawn to the Laurus nobilis or cold-hardy varieties like Umbellularia californica, these evergreens bring beauty and practicality to any space.
With the right care and location, your bay tree will thrive, offering shade, scent, and culinary benefits for years to come.
Ready to get started? Pick your favorite variety, gather your supplies, and plant with confidence! 🌱 Whether you’re a seasoned gardener or a beginner, your bay tree will reward you with lush, aromatic foliage—so roll up your sleeves and enjoy the process!