
Pruning
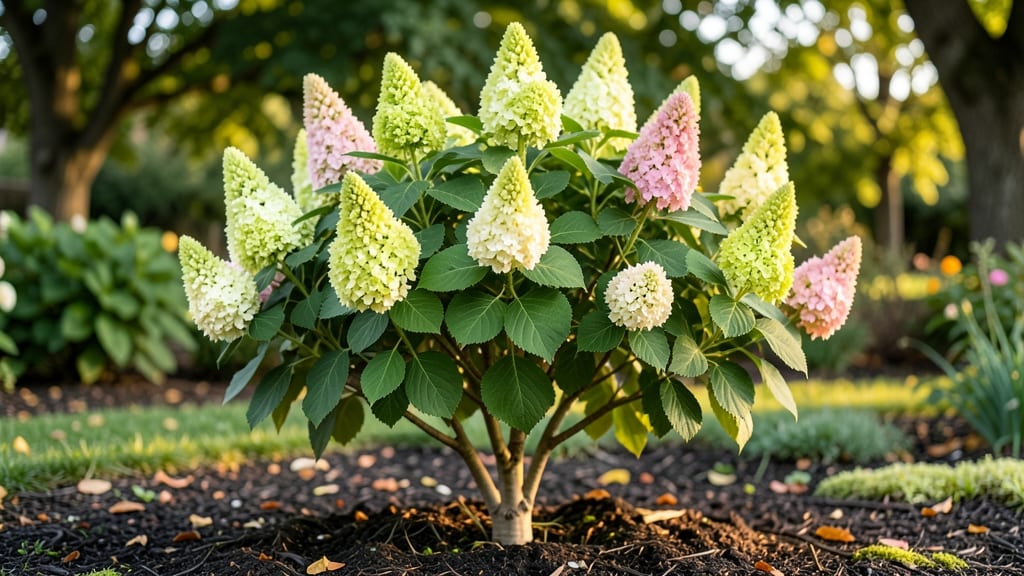
A Limelight Hydrangea Tree reaches its full size of 6 to 12 feet with the right care, but many gardeners miss the mark on pruning—leaving their shrubs leggy or underwhelming.
If your 🌸 Limelight Hydrangea Tree isn’t blooming as spectacularly as you’d hoped, the issue might be hiding in your pruning schedule—not your green thumb. This fast-growing shrub thrives on precise timing and technique to produce those iconic lime-green blooms year after year.
At maturity, this stunner stands taller than a standard doormat but shorter than a basketball hoop, making it a statement piece in any landscape.
The key to keeping it lush and blooming lies in understanding when to prune—late winter or early spring—and how much to trim to encourage those cone-shaped flowers that shift from lime to pink as summer progresses.
Below, I’ll break down the exact pruning schedule, tools, and techniques to keep your Limelight Hydrangea Tree at its peak size and bloom potential, so you can enjoy its showstopping display for decades.


When and how to prune Limelight Hydrangea trees for maximum blooms
The Limelight Hydrangea Tree (Hydrangea paniculata 'Limelight') rewards precise pruning with vibrant, abundant blooms that transition from lime-green to deep pink. Unlike other hydrangeas, this variety blooms on new wood, meaning last year’s growth won’t produce flowers—only this year’s stems will.
Timing and technique are everything to avoid missed blooms or stunted growth.
Most gardeners prune at the wrong time, often cutting back too late in spring or too aggressively in fall. The key is to prune during dormancy (late winter/early spring) while the plant is still asleep but before new growth begins.
This ensures you’re shaping stems that will bloom within the same season. Let’s break down the exact steps to maximize those stunning cone-shaped flowers.
Step-by-Step Pruning Guide for Limelight Hydrangeas
-
Step 1: Choose the Right Time
Prune in late winter (just before buds swell) or early spring (before leaves emerge). Avoid fall pruning—it removes next year’s blooms. -
Step 2: Gather Your Tools
Use clean, sharp pruners (bypass pruners work best) and disinfect tools with rubbing alcohol to prevent disease spread. -
Step 3: Remove Dead or Weak Wood
Cut out dead, diseased, or crossing branches first. These won’t bloom and can block airflow. -
Step 4: Thin Out Crowded Stems
Select 6-8 strongest stems to keep—remove weaker ones at the base. This improves airflow and bloom quality. -
Step 5: Cut Back Remaining Stems
Trim remaining stems to 12-18 inches tall (about 1/3 of their height). Cut just above a bud or lateral branch. -
Step 6: Shape for Balance
Step back and visualize the shape. Aim for a rounded, open center to encourage new growth from the base. -
Step 7: Clean Up
Rake up debris and dispose of clippings (don’t compost if diseased). Mulch around the base to retain moisture.
One of the biggest mistakes I see is over-pruning Limelight Hydrangeas, which can leave them looking bare or struggling to recover. This variety is hardy and fast-growing, but it needs enough stems to support its 6-12 ft mature height.
If you cut back too severely, you’ll sacrifice next year’s blooms.
For young Limelight Hydrangeas (under 3 years old), prune lightly—just remove dead wood and shape gently. Mature trees can handle more aggressive pruning, but never remove more than 1/3 of the plant in one season.
Always prune just above a bud or branch to encourage new growth in the right direction.
After pruning, monitor your hydrangea closely for new growth signals. Within 4-6 weeks, you should see fresh green shoots emerging from the base and along the stems.
If growth is slow, check your soil moisture and sunlight exposure—Limelight Hydrangeas thrive in partial shade (4-6 hours of sun daily) and well-draining soil with a pH of 5.5-6.5.
Pro tip: If your Limelight Hydrangea isn’t blooming as expected after pruning, it might be under-fertilized. Feed with a balanced fertilizer (10-10-10) in early spring and again after pruning to support new growth. Avoid high-nitrogen fertilizers—they promote leafy growth at the expense of flowers.
Finally, remember that consistency is key. Prune your Limelight Hydrangea at the same time each year to establish a routine. Over time, you’ll notice larger blooms, denser foliage, and a healthier overall plant.
With the right timing and technique, your Limelight Hydrangea will become the showstopper of your garden.
🌿✂️🌸
Common pruning mistakes that kill Limelight Hydrangea blooms (and how to fix them)
Your Limelight Hydrangea may look healthy, but if those lime-green blooms are sparse or nonexistent, your pruning technique could be the culprit. This shrub relies on precise cuts to encourage vibrant, abundant flowers. The wrong timing or approach can send your plant into a bloom drought for years.
One of the biggest misconceptions is that more pruning equals better growth. In reality, aggressive cuts can trigger stress, forcing your hydrangea to revert to smaller, less vibrant blooms. Let’s uncover the 5 fatal pruning mistakes and how to reverse them before your next growing season.
⚠️ Warning: These Cuts Will Kill Your Limelight Hydrangea Blooms
Pruning at the wrong time (like summer or fall) or removing too many stems can stunt blooms for 2+ years. Limelight Hydrangeas bloom on new wood, so cuts made after mid-spring will eliminate next year’s flowers.
Mistake #1: Pruning in late summer or fall. This is the most common error, and it directly impacts next year’s blooms. Since Limelight Hydrangeas produce flowers on new growth, any cuts made after mid-spring will remove potential bloom stems.
Instead, focus on late winter or early spring pruning (just before buds swell).
Mistake #2: Removing more than 1/3 of the plant in a single session. Over-pruning stresses the shrub, reducing its ability to produce large, vibrant blooms. Aim to remove only dead or weak stems and shape lightly. For mature trees, limit cuts to 20-30% of the total growth per year.
Mistake #3: Using dull or dirty pruners. Ragged cuts expose the plant to disease and pests, weakening its overall health. Always use sharp, sterilized tools and make clean cuts at a 45-degree angle, just above a bud or leaf node.
A quick wipe with rubbing alcohol between cuts prevents bacterial spread.
Mistake #4: Cutting too close to the bud. Leaving a stub or cutting above a bud can lead to poor regrowth or even dieback. Always cut just above the outer bud (the one facing outward on the stem) to encourage upward growth and fuller blooms.
Mistake #5: Ignoring dead or diseased stems. Leaving blackened or mushy wood can spread rot and attract pests, further weakening the plant. Remove these stems immediately—even if it means pruning outside the ideal window. Healthy stems are the foundation of abundant, lime-green blooms.